

KMC CREATIVES | LET THERE BE WHITE!
 I have a confession: My name is Kathleen and I am a lamp
 hoarder lover. If I had to identify a single element in the home that I am always drawn to, I would have to say that lamps take me out every time. The shape, the scale, the material, the feel...I just can't help but buy them even if I don't need them. Sigh...
So for Project: Be Our Guest I had already purchased a set of lamps, but when I saw these beauties for $40 less than what I originally paid, I just knew I had to have them. It was a very pretty teal blue. The lamp shades, mmm...cute, but not my cup of tea!
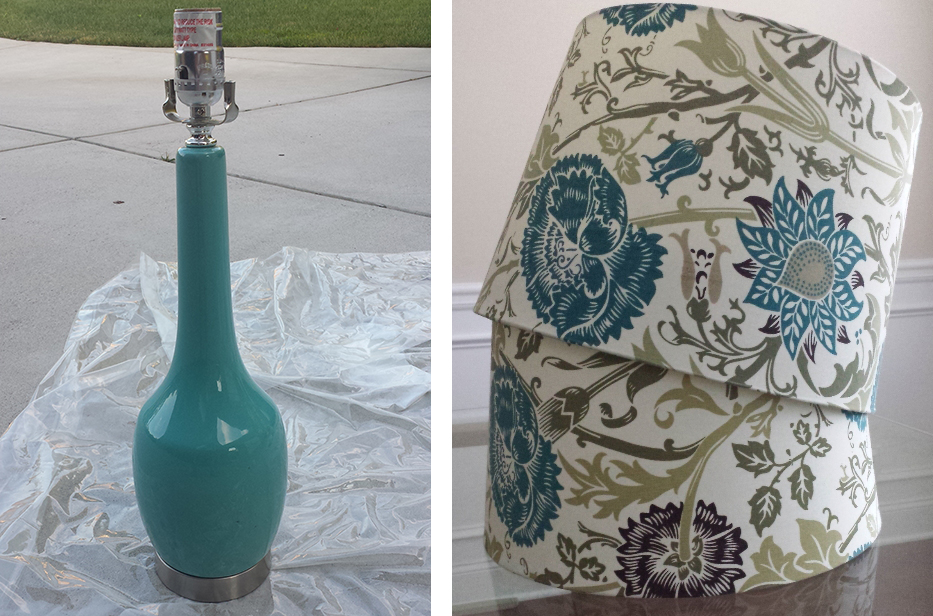
The shape, the height, the scale...all was dead on. Although the lamps were pretty, I knew I wanted white! A bright, clean, pure white. I figured spray paint and a little lamp shade change action could go along way. *shrugs shoulders * So why not! Project: Let There Be White - Let's begin!
What You Will Need (to tackle a project like this and you can follow the order too)
- Lamps (of course!)
- Damp Soft Cloth
- Wonderful for cleaning lamps. Let dry over night if you can wait!
- Painters Tape & Plastic Bag
- Tape off the electrical opening and about a third of the cord. Place remaining cord in plastic bag. Seal bag to cord with painters tape.
- Spray Paint Primer
- I used Zinser Bull's Eye 1-2-3.
- Spray Paint
- I used Krylon Colormaster White Gloss. Lightly spray around lamp until it is evenly coated.
- Lamp Shades
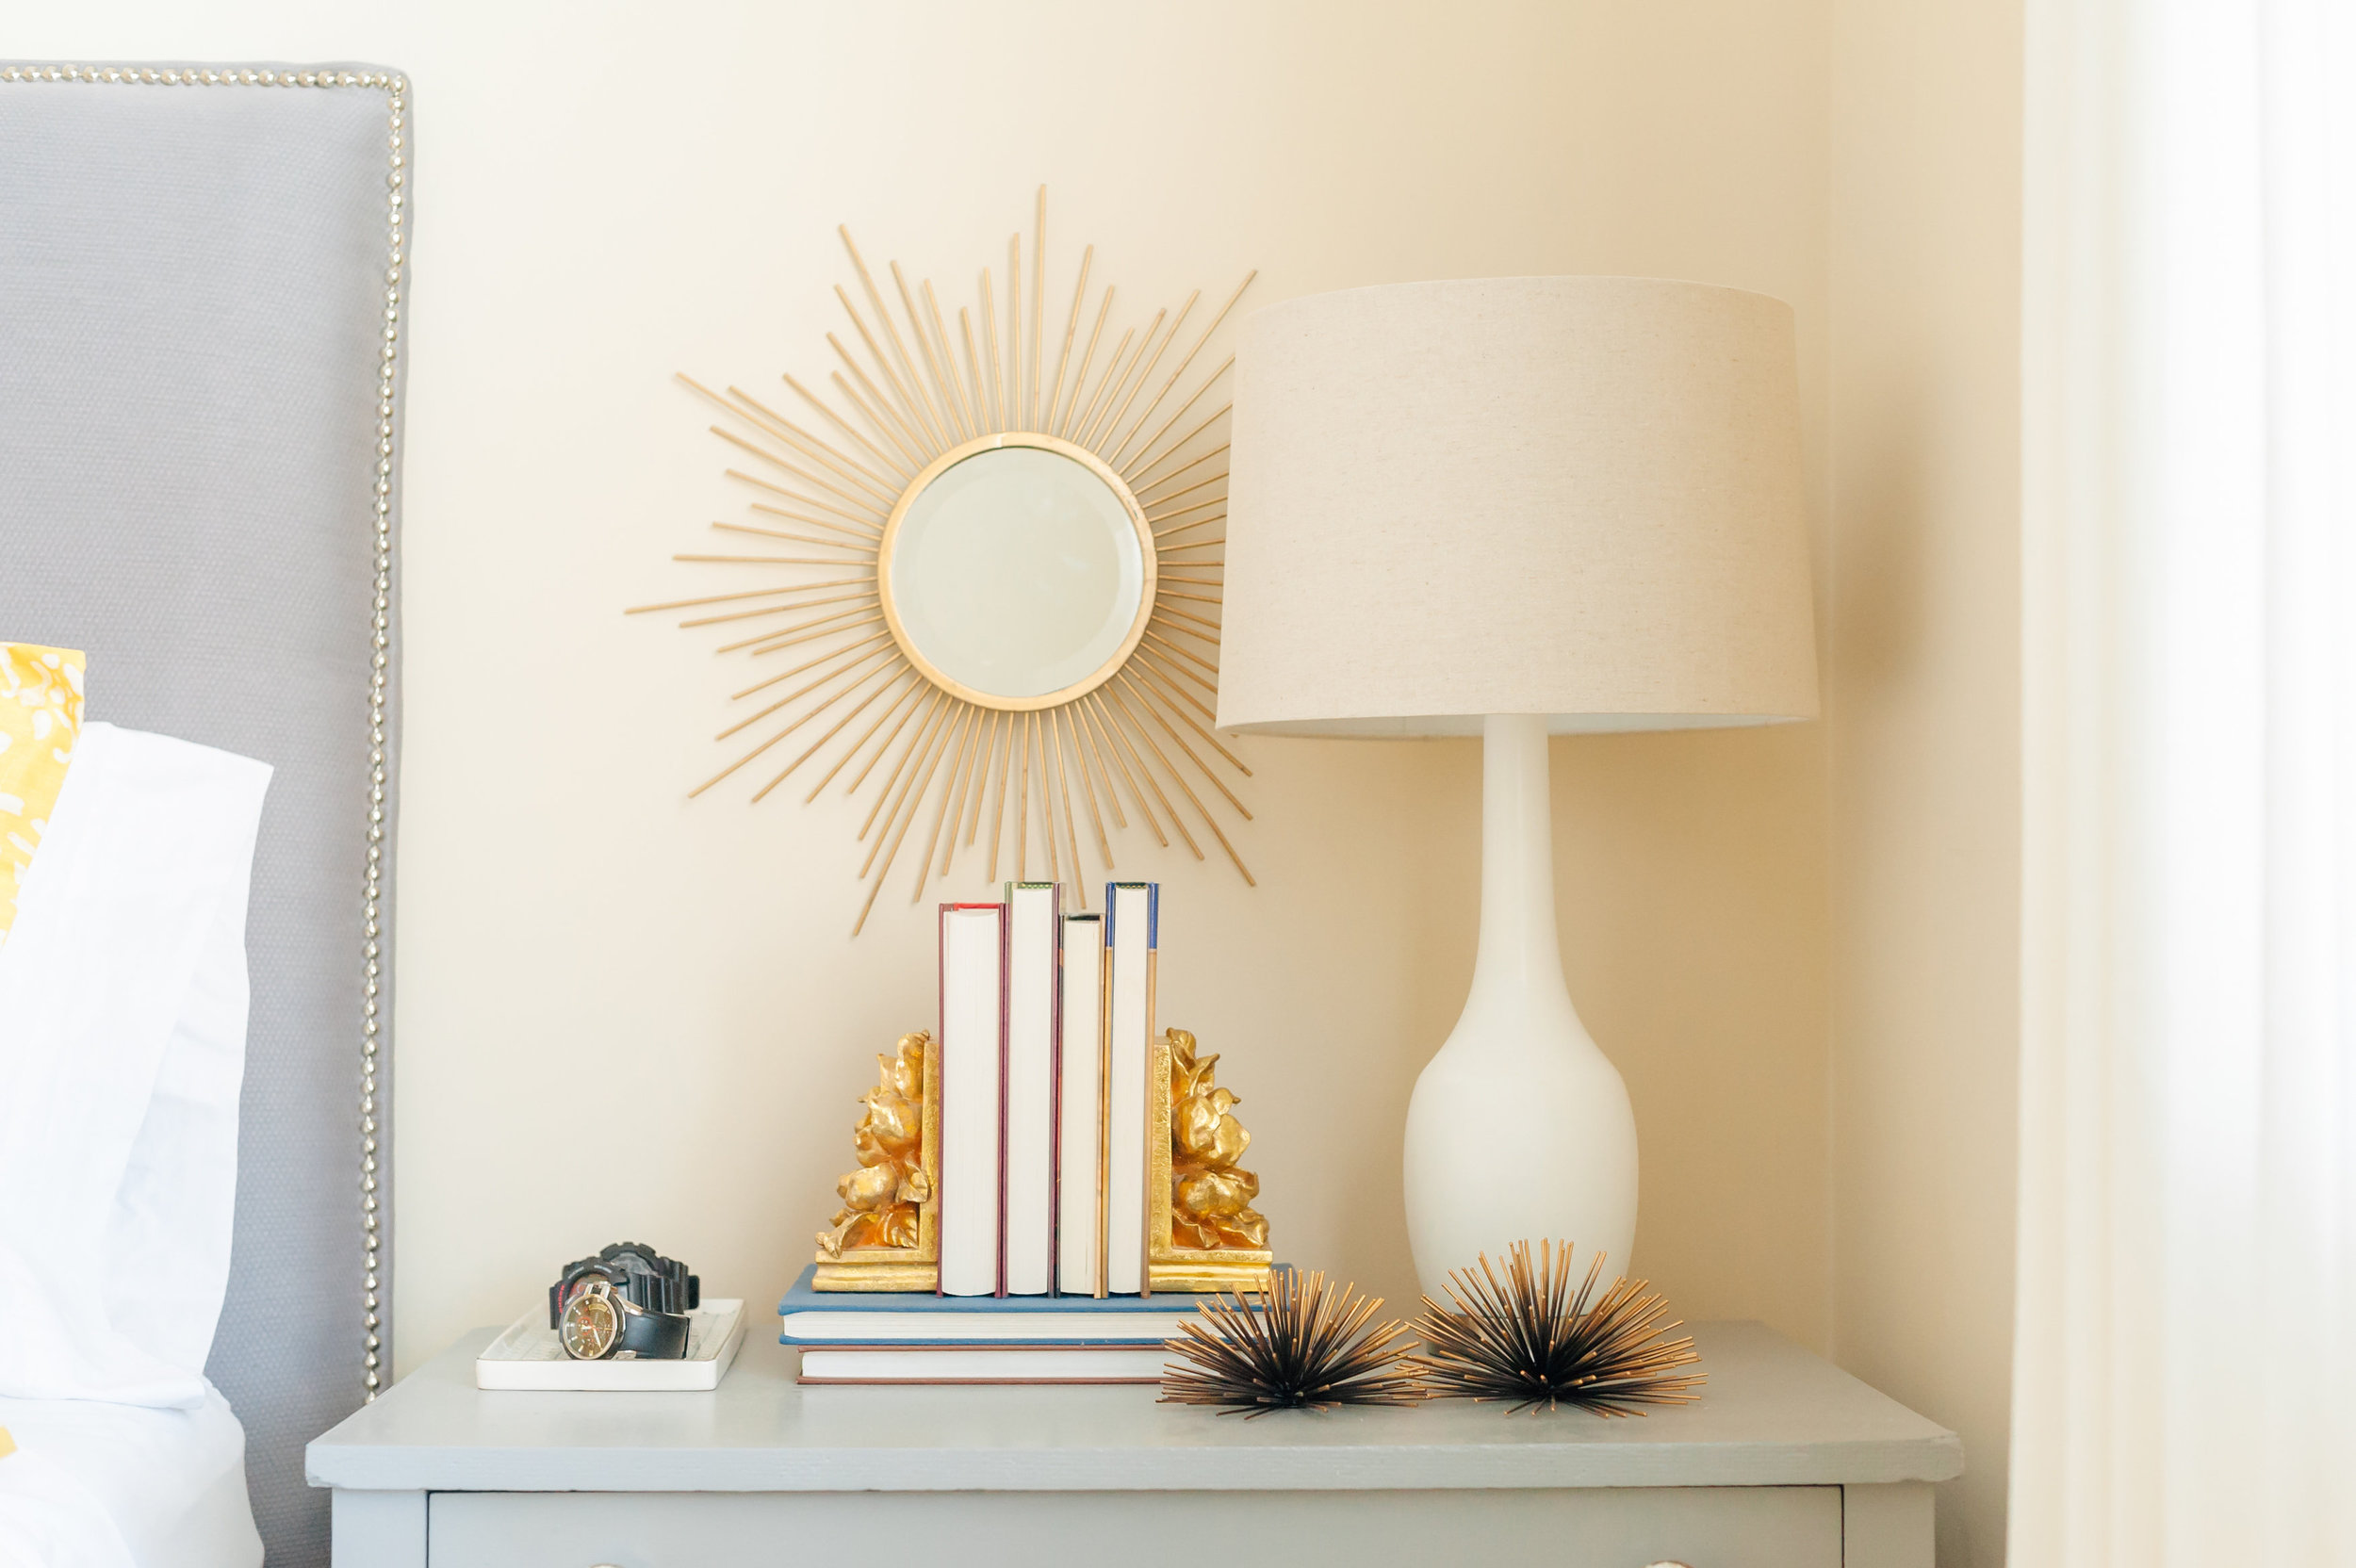
The Results! Instant Love!
Have any other good spray painted projects? If so, let me know. Happy Spraying!
Making Home, Home!
Kathleen
KMC CREATIVES | BED SIDE TABLE MAKEOVER
 For Project: Be Our Guest, I knew I didn't want to spend a lot of $$$ on bed side tables. I mean, good quality, solid wood tables of a good size can be costly, but I just didn't want to spend that much. So on two separate occasions I decided to run into a Goodwill and a consignment shop I seldom visit, just to kill some time. These visits were two years apart and to be honest I wasn't really looking for side tables. I wasn't really looking for anything. But wouldn't you know - sometimes you find those jewels when you least expect it.
The Goodwill Deal This piece was a hardy piece of vintage beauty. Very sturdy - a nice weight, and as it turned out the perfect height for a high mattress. It was solid wood with dove tailed drawers and rattan caining on the drawer fronts. The top was made from what looked like particle board with a laminate top. The top was also a little chipped. The feet were peeling also, but I saw what it could be. And for $20 you betcha!

The Consignment Find Fast forward two years later - which is now two years ago (I hoard furniture too, not just lamps =/) and I found this beauty.

Solid wood, but not your typical side table. Why? You ask. Because it had - are you ready for this - a working, metal (you hear me folks, metal) sewing machine inside. Ahhh.....a treasure indeed. They just don't make sewing machines like this anymore. Sooooo good I tell ya! When I saw it I instantly thought about the Goodwill deal and thought hmmm......they are about the same height. I knew it could work. I didn't need to use the sewing machine. So why not! The scale was right for where it was going, the width and length was right, and for $10 - yes, Yes, YES! For $10, I couldn't go wrong. Annnd if it didn't work out, it would be okay. It was only $10.
What You Will Need (to tackle a project like this and you can follow the order too)
- A good furniture cleaner or what I used - mild soap and water.
- Give it a good scrub and then quickly wipe it down to dry. I read that you could use vinegar, but I haven't tried it.
- Orbitsander
- A must for a project this size, really any larger scale project. You can use a sanding block, or sheet of sand paper for the harder to get to areas. Sand lightly between coats of paint.
- Foam Roller
- Roller for smooth surfaces. The coverage is pretty good. You can also use a paint sprayer for an even smoother finish. The paint sprayer is on my supply bucket list for home improvements. Ohhhh Santa.....
- Primer
- I am a fan of Zinser Bull's Eye 1-2-3. Good coverage goes a long way.
- Paint
- I used Glidden Semi-Gloss. Ohhh....I can't remember the color. A nice pure gray. Paint several thin coats. It will dry faster and your finish will be smoother. No drips!
- MinwaxWaterBasedPolycrylic
- Applied as a top coat. I did two coats letting it dry between coats. It is a protective finish.
I decided to leave all the bumps and bruises because design does not always have to be super perfect, but it should always be super personal. For me, the bumps and bruises in these pieces tell me that there is a history - it's not super polished or out of the box - it's dated and it's been around.
The Results! I am in love! See how far a good primer and a little paint can go!


Next week I will tell you all about the lamps! Have any great finds that you have painted? Leave me the link to your blog or website so I can check them out!
Making Home, Home!
Kathleen
PROJECT | BE OUR GUEST
The Inspiration for Project | Be Our Guest - ' The Green Mile'. I painted this piece back in 2008. It is my favorite piece of art. I have received many offers for it, but could never part with it because of how much I love it. I knew that this piece would be hung in the guest room. Shades of cream, red, pink, green, orange - the perfect color palette for this space. It added such a face lift to the room and makes me happy to see it finally hung. Let's take a look at the before...

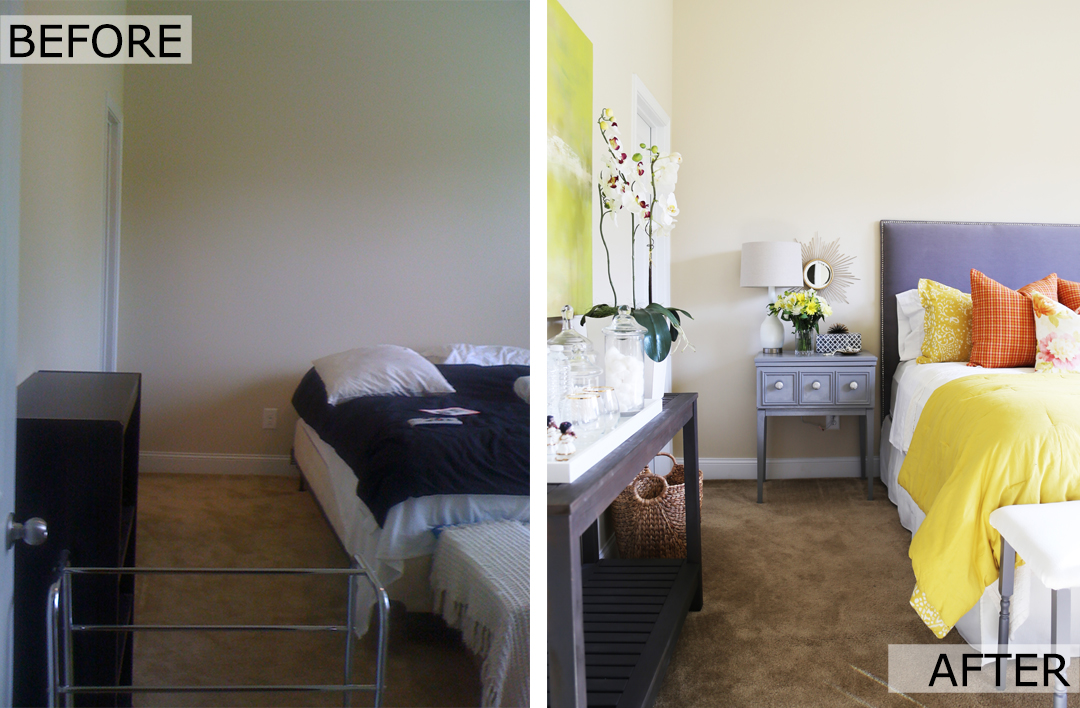
Boy oh boy have we come a mighty long way and it has taking a while to get here. Oddly enough, I thought I blogged about the sad beginnings of this room, but it appears that I never mumbled a word. So, now I have to give you the scoop on it's evolution. Here is where we began.
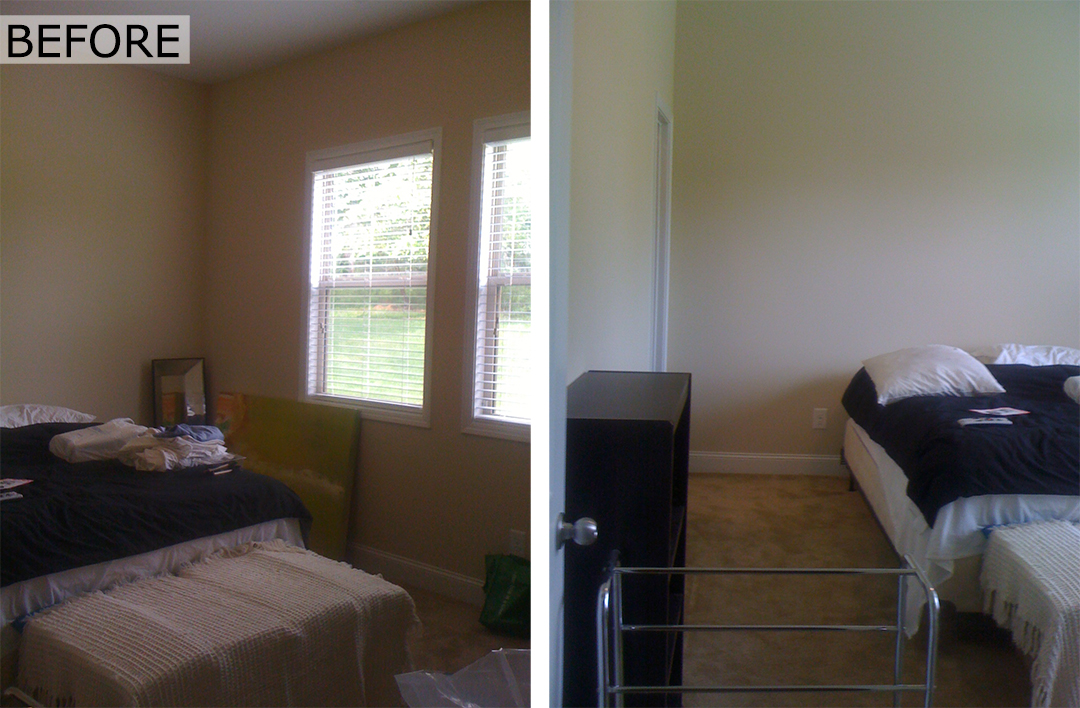
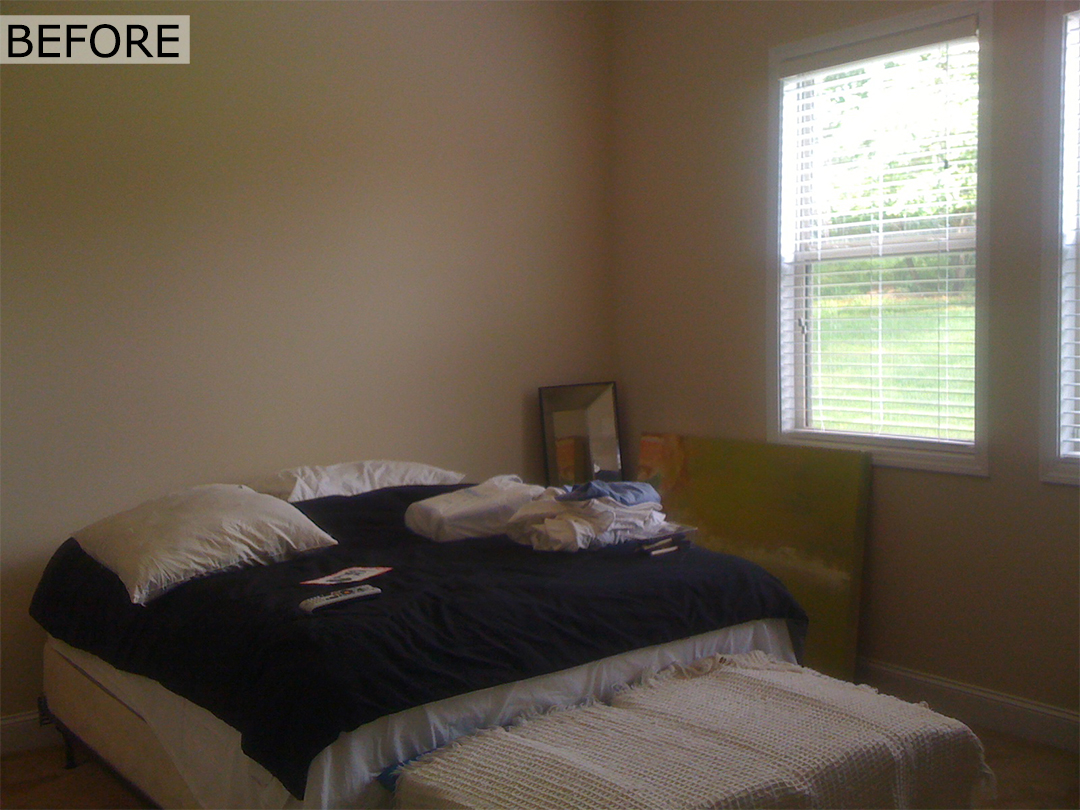
This room did it's duty as being a functional space, basically a place for our guests to sleep. But it definitely wasn't fresh feeling or had any style.
What we needed to do to up the anty:
- Clearly there was no design plan. Yikes and Sigh...as a designer, of course I know better. But sometimes projects fall on the back burner around here because I am doing other things.
- As you can see, we kinda needed everything but the kitchen sink - well everything except a bed. We were on a tight budget for this room. So everything had to be super cost efficient.
- Bed side tables were desperately needed. Fortunately I found side tables a few years back that I knew I would eventually use in this space. Details about how I overhauled those will be coming up in the next few posts.
- We needed storage. A dresser, a chest of drawers, something.
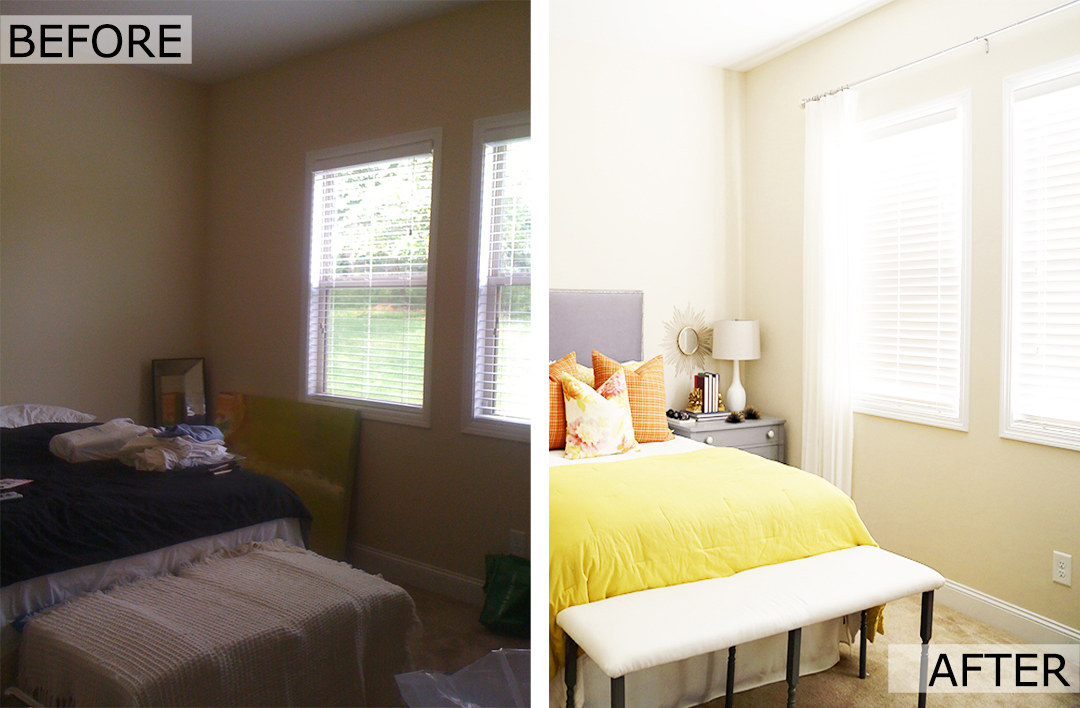
- Drapes were needed too. The harsh lines of the window trim kind of drives me crazy at times. And this is one of those times.
- A custom headboard to eat up some of the vertical space was also a must.
The good news:
- The room was like a blank slate. The walls were a rich creamy, antique white. So any colors could work.
- We had my favorite art piece of all times as the launching pad for the color scheme. And I knew exactly where I wanted to use it in this space.
- The layout of the room was super easy to work with it.
- The room offers an amazing amount of natural light so I knew exactly what color drapes I wanted to use and where to purchase them.
- I also already had the drapery hardware from at least a year prior. I think I found it on sale at HomeGoods for like $10 or $15. Score!!
After all was said and done - The Results!
There is nothing more that I love than a calm, neutral backdrop to bold punches of color. And that is exactly what we did here. Keeping the wall neutral allowed for warm grays to be used on the headboard, console, and side tables, and bold mustard and shades of orange to be used in the bedding. See how well the art plays with all the other colors in the room? I just love it!
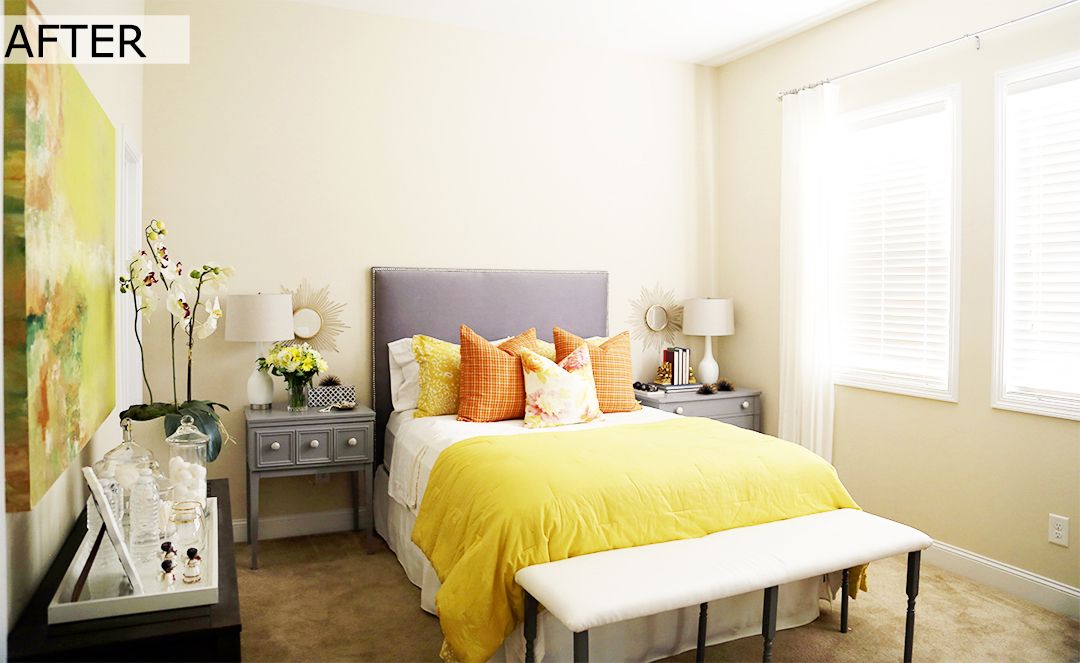


I have to admit, right now it's one of my favorite rooms in the house. It combines my husband's style (which is clean lined and minimal) with mine (clean lined with a mix of old and new).
There are quite a few KMC Creatives projects in here. I will be sharing them with you over the next few weeks. Be sure to subscribe so you don't miss out!
Making Home, Home!
Kathleen