
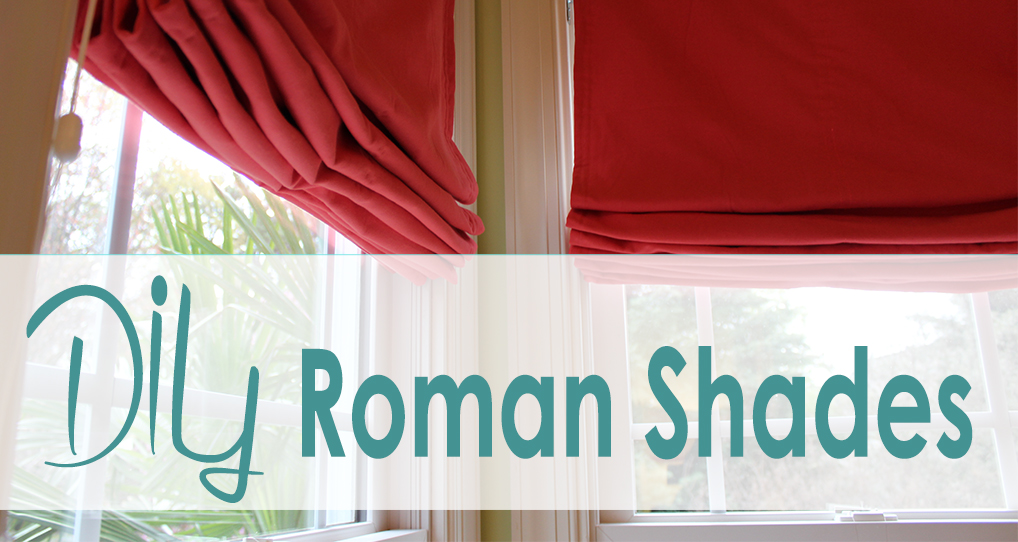
DIY ROMAN SHADES | TROPICAL G's OFFICE MAKEOVER, PART 3
 For starters, I LOVE the windows in Tropical G's office. They are nicely tucked away in the corner which gives full usage of the walls on both sides. They allow a nice amount of natural light into her space, and the view...OMG...the view is beyond amazing! It looks like a little Hawaiian oasis in her backyard. She has a huge, beautiful palm tree that sits right at her window and takes you away to a place that's all dreamy. Isn't the view all kinds of lovely! GAAH!!!!

I knew when we started this project (Part 1) that I wanted to hang roman shades. Because of how tight the windows are in the corner, hanging ceiling to floor drapes was not the best idea. And the fact that I was recommending the removal of the doors from the closet (Part 2) and replacing those doors with drapes was another factor. The roman shades would allow the room to feel a little more fresh and light, and could be easily pulled all the way up to escape to paradise. The fabric I selected paired so beautifully with the peacock fabric for the closet door replacement. It kept the tropical vibe going.
Tip: When selecting fabrics, I like to start with what I call a base fabric. The base fabric is used to pull together the color scheme for your space. It is a sure fire way to select fabrics and hues that complement each other.
Of course, the seamstress herself would have a hand at making the shades, and she is talking all about it today on her blog, Casa Bouquet. So to learn more, hop on over there and check it out. Be sure to come back next week for the final reveal of Project Tropical G!
Excerpt from Casa Bouquet – DIY Roman Shades
We had a little bobble when Kathleen (of Kathleen Mapson & Company) suggested roman shades for my two corner windows. Too many of the DIY links we found were for non-operational shades. So here’s my version of what works!
Kathleen chose a coral-red fabric with no pattern. So we did not have to worry about a repeat. Other supplies I needed were 1×2 pieces of wood for each window, 2 flat wood pieces for bottom of shade (1 x ¼ inch), 2 L-brackets for each window with screws, electric screwdriver or drill, electric staple gun, blackout curtain lining, roman shade tape with rings, cord for the rings, cord condensers, cord cleats, new size-18 machine needle, and 1 spool of thread to match the fabric. [I just love that the thread for this project was “Flamingo”!]
Don't forget to stop by Casa Bouquet now!
Making Home, Home!
Kathleen
DIY PINCH PLEATED DRAPES | TROPICAL G's OFFICE MAKEOVER, PART 2

 As you could probably tell from the previous post about Project Tropical G (part 1), the footprint was on the smaller side - 10' x 11'. Because of it's size, I knew that removing one thing in particular in the room - the closet doors - would be a game changer. The doors (as you can see from the photo below) opened into the room. If the doors were left on the closet, they would take up too much floor space when opened, leaving little to no space to get all the furniture we needed into the room.
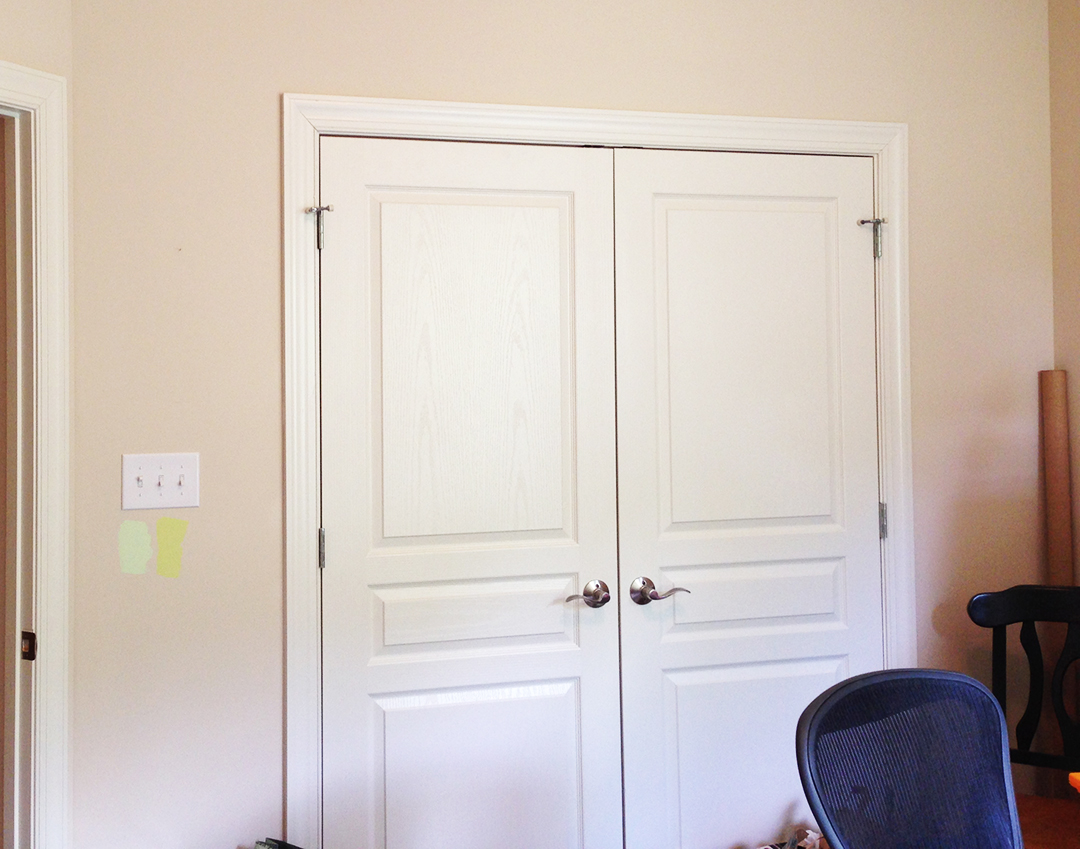
I proposed to Lisa that we remove the closet doors. At first she was not on board with the idea, but I knew that this was the right change. It took some convincing and the icing on the cake was when she told me that her husband and their daughter (who is a design enthusiast) was on board with the idea and they both totally 'got it' when she shared with them my idea. Don't you just love when that happens? So, what to put in it's place? Custom drapes of course! Adding drapes would not only give her extra space, but also provide the privacy she needs to keep hidden any items in her closet, (with the right fabric) give her some bold color and pattern, and add softness to combat all those hard office lines.
Tip: When working in a small space, consider removing the doors in your room. The swing of the doors can take away too much floor space. You can add drapes to provide closure or if you need something a little more private and you have an appropriate wall length, you could also add a pocket door or barn doors. Doing so can instantly add valuable space back into your room.
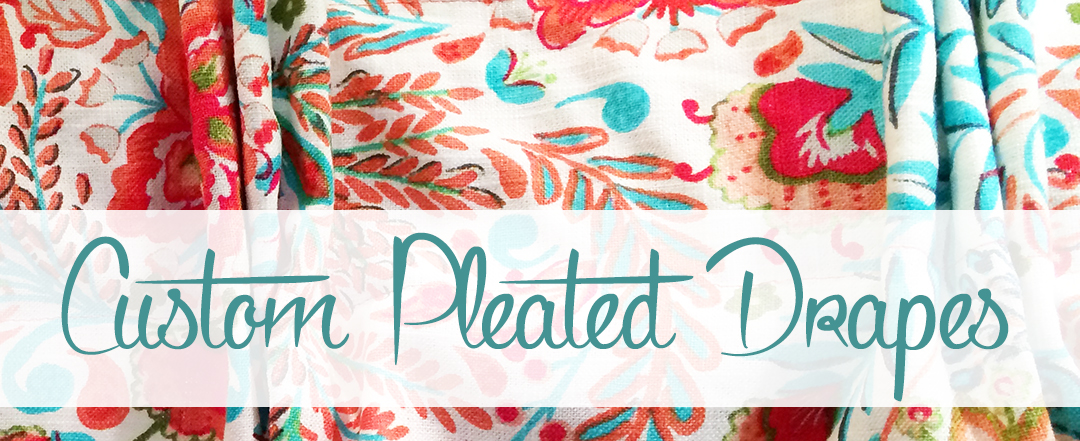
Because of her love of all things tropical, I sourced Waverly's Peaceful Perch Sherbert. The fabric boasted a bold print with shades of coral and turquoise, and hints of minty green like that of the walls. It also had a wonderful repeat of peacocks that I knew she would love. And why wouldn't she? This fabric embodied everything she loved!

Lisa has her own design ideas and her strength is at the sewing machine. I initially proposed back side concealed top drapes, but she wanted to modify the design and make pinch pleated drapes. I knew they would look just as swell so she had no arguments from me. And let me tell you, she did an awesome job!
Excerpt from Casa Bouquet - DIY How To Make Pinch Pleat Drapes
The “junk room” in our house was supposed to be my office! I was sewing and working around piles that didn’t have a place to belong. This is Part 2 of the journey from junk room to peaceful tropical office with Kathleen Mapson & Co. [See part 1 here!]
I was overcome when Kathleen first said, “You have to take down the closet doors.” She convinced me that drapes would give softness and allow more room in the office. It helped a lot that she found this gorgeous print with flowers and peacocks (Waverly Peaceful Perch Sherbert)! Today I’m sharing what I came up with for covering the closet while also being the accent wall.
Check out the results and read more about how to make your own pinch pleated drapes by visiting Casa Bouquet. You won't be disappointed!
Making Home, Home!
Kathleen

KMC CREATIVES | LET THERE BE WHITE!
 I have a confession: My name is Kathleen and I am a lamp
 hoarder lover. If I had to identify a single element in the home that I am always drawn to, I would have to say that lamps take me out every time. The shape, the scale, the material, the feel...I just can't help but buy them even if I don't need them. Sigh...
So for Project: Be Our Guest I had already purchased a set of lamps, but when I saw these beauties for $40 less than what I originally paid, I just knew I had to have them. It was a very pretty teal blue. The lamp shades, mmm...cute, but not my cup of tea!
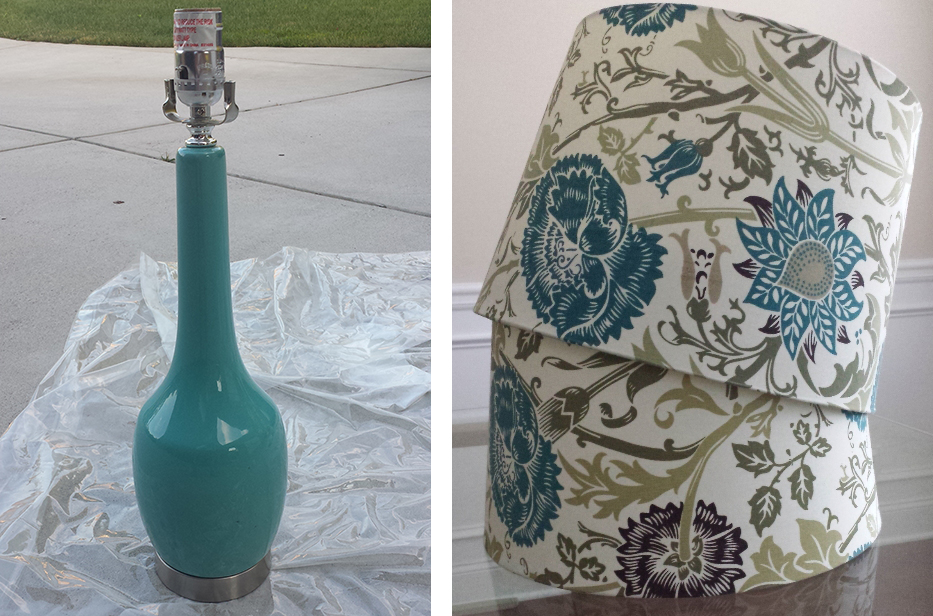
The shape, the height, the scale...all was dead on. Although the lamps were pretty, I knew I wanted white! A bright, clean, pure white. I figured spray paint and a little lamp shade change action could go along way. *shrugs shoulders * So why not! Project: Let There Be White - Let's begin!
What You Will Need (to tackle a project like this and you can follow the order too)
- Lamps (of course!)
- Damp Soft Cloth
- Wonderful for cleaning lamps. Let dry over night if you can wait!
- Painters Tape & Plastic Bag
- Tape off the electrical opening and about a third of the cord. Place remaining cord in plastic bag. Seal bag to cord with painters tape.
- Spray Paint Primer
- I used Zinser Bull's Eye 1-2-3.
- Spray Paint
- I used Krylon Colormaster White Gloss. Lightly spray around lamp until it is evenly coated.
- Lamp Shades
The Results! Instant Love!
Have any other good spray painted projects? If so, let me know. Happy Spraying!
Making Home, Home!
Kathleen
KMC CREATIVES | BED SIDE TABLE MAKEOVER
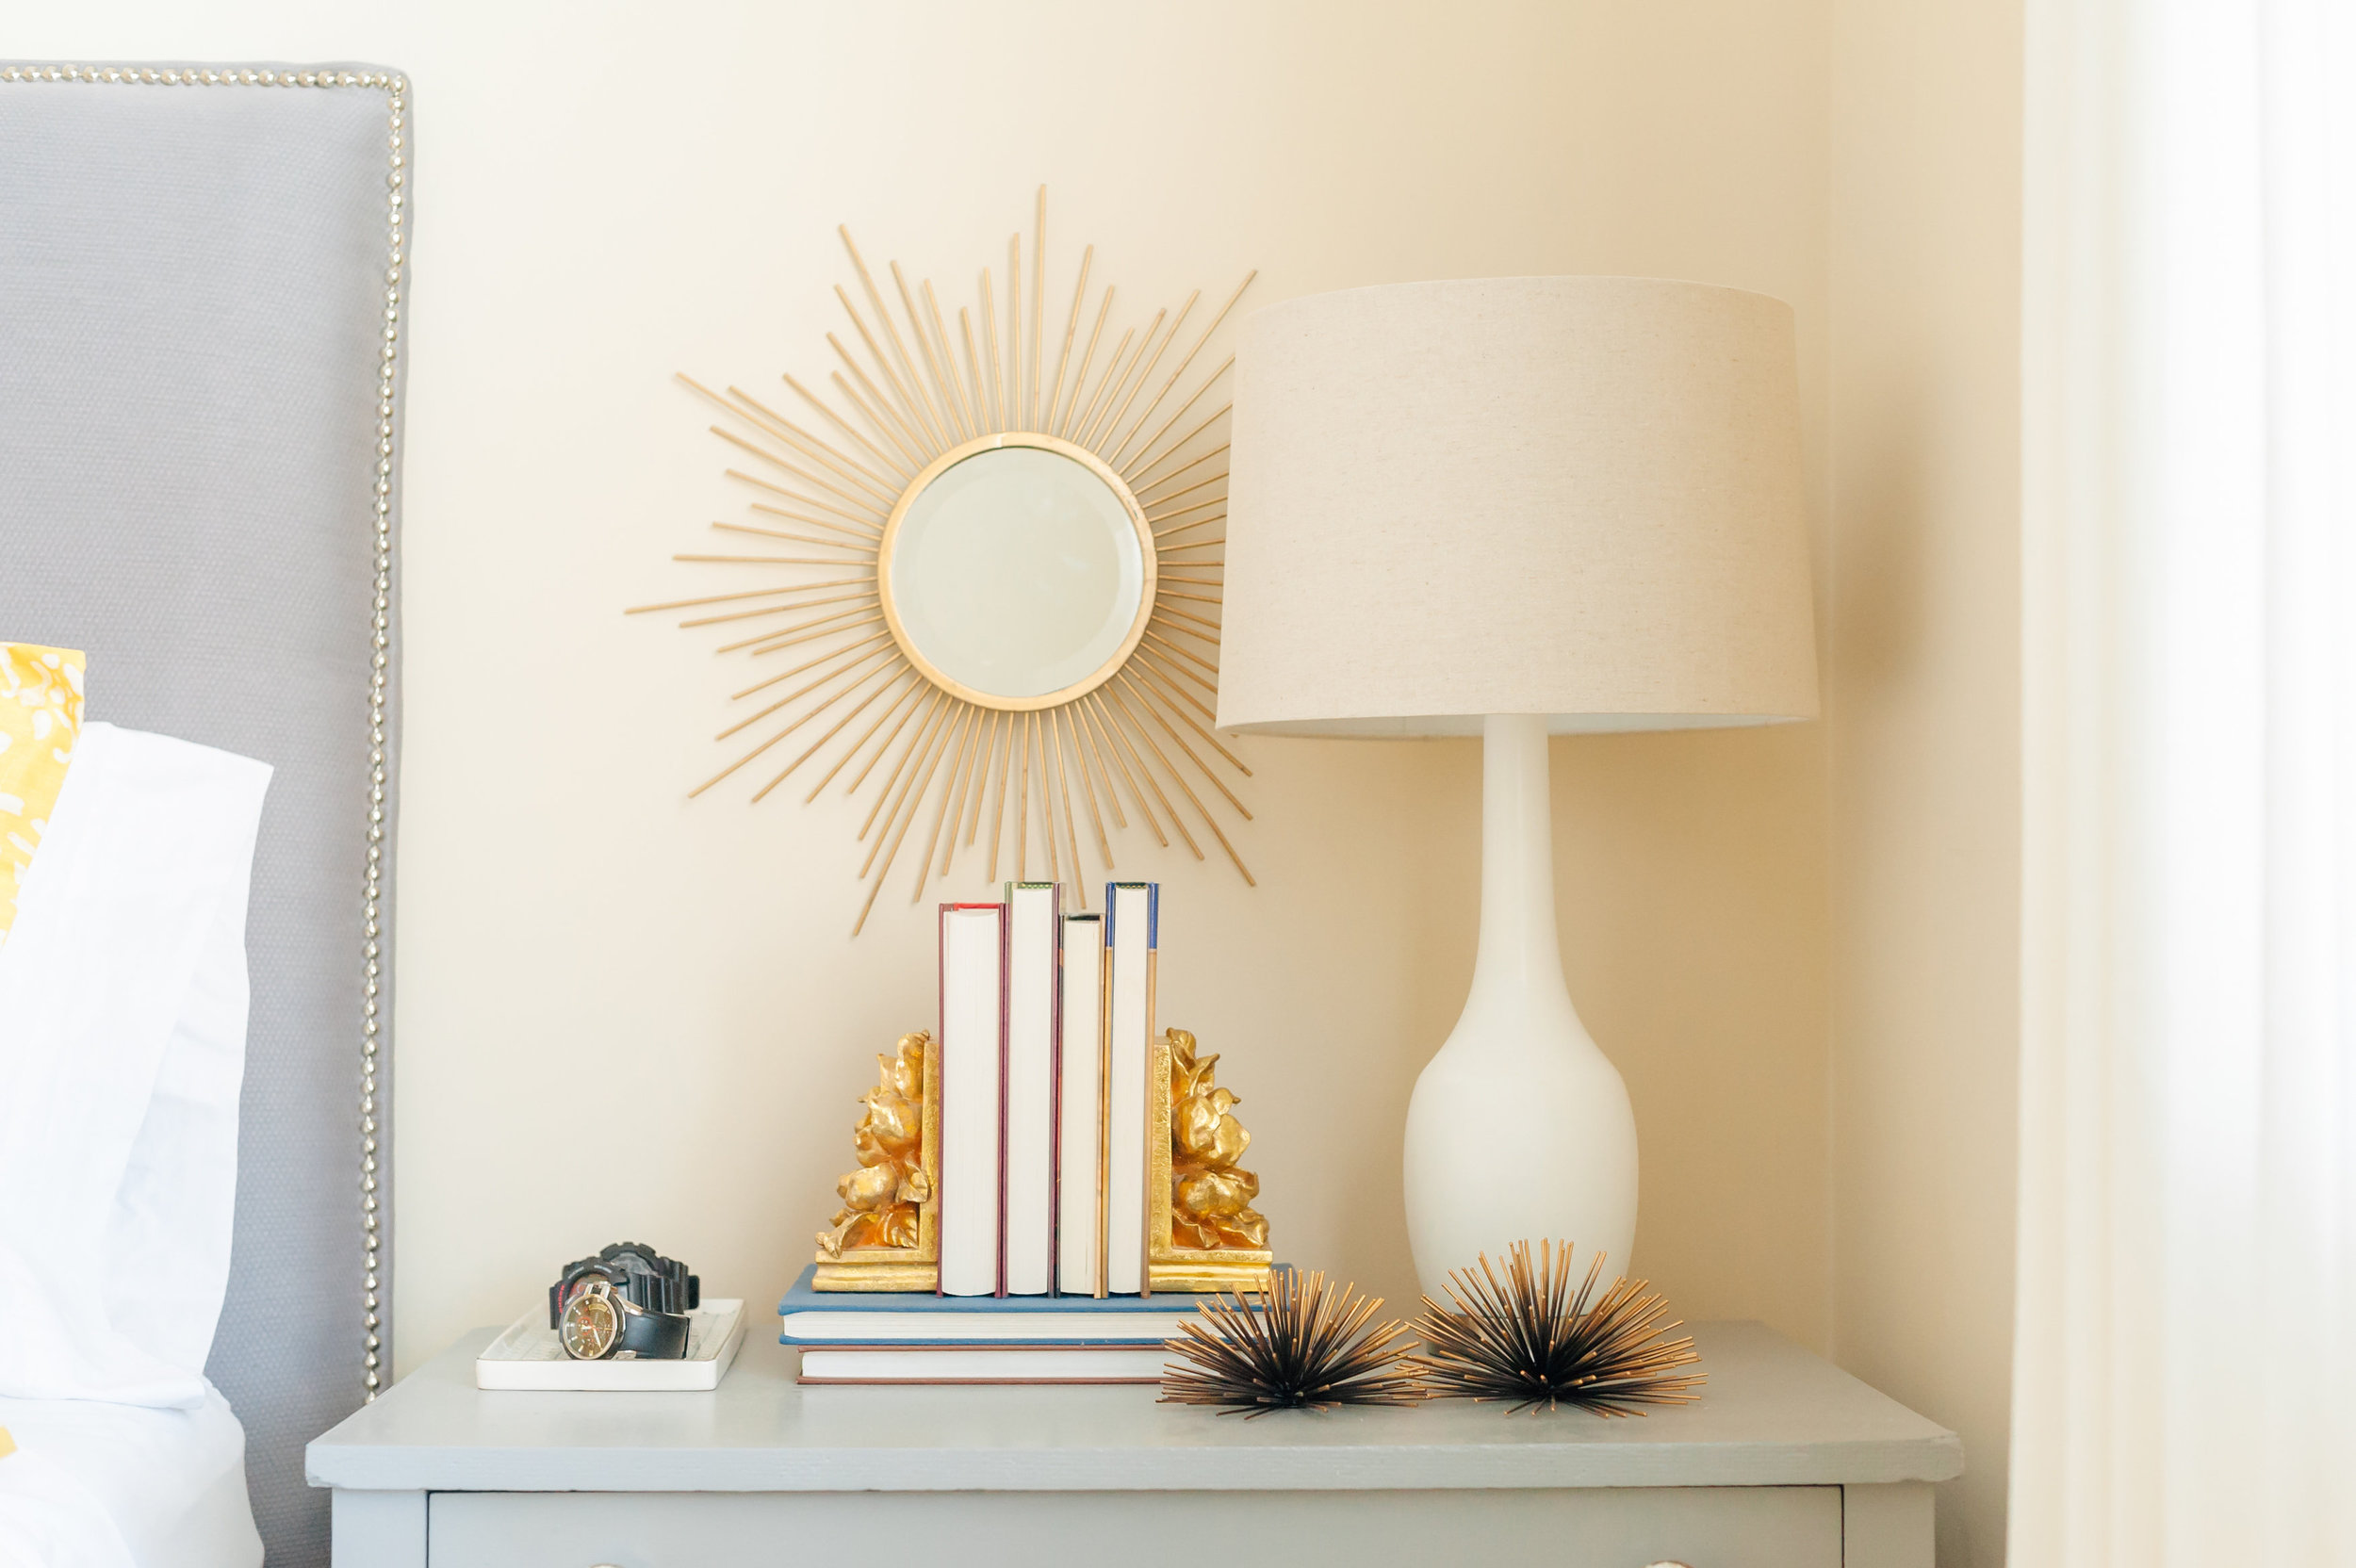
 For Project: Be Our Guest, I knew I didn't want to spend a lot of $$$ on bed side tables. I mean, good quality, solid wood tables of a good size can be costly, but I just didn't want to spend that much. So on two separate occasions I decided to run into a Goodwill and a consignment shop I seldom visit, just to kill some time. These visits were two years apart and to be honest I wasn't really looking for side tables. I wasn't really looking for anything. But wouldn't you know - sometimes you find those jewels when you least expect it.
The Goodwill Deal This piece was a hardy piece of vintage beauty. Very sturdy - a nice weight, and as it turned out the perfect height for a high mattress. It was solid wood with dove tailed drawers and rattan caining on the drawer fronts. The top was made from what looked like particle board with a laminate top. The top was also a little chipped. The feet were peeling also, but I saw what it could be. And for $20 you betcha!

The Consignment Find Fast forward two years later - which is now two years ago (I hoard furniture too, not just lamps =/) and I found this beauty.

Solid wood, but not your typical side table. Why? You ask. Because it had - are you ready for this - a working, metal (you hear me folks, metal) sewing machine inside. Ahhh.....a treasure indeed. They just don't make sewing machines like this anymore. Sooooo good I tell ya! When I saw it I instantly thought about the Goodwill deal and thought hmmm......they are about the same height. I knew it could work. I didn't need to use the sewing machine. So why not! The scale was right for where it was going, the width and length was right, and for $10 - yes, Yes, YES! For $10, I couldn't go wrong. Annnd if it didn't work out, it would be okay. It was only $10.
What You Will Need (to tackle a project like this and you can follow the order too)
- A good furniture cleaner or what I used - mild soap and water.
- Give it a good scrub and then quickly wipe it down to dry. I read that you could use vinegar, but I haven't tried it.
- Orbitsander
- A must for a project this size, really any larger scale project. You can use a sanding block, or sheet of sand paper for the harder to get to areas. Sand lightly between coats of paint.
- Foam Roller
- Roller for smooth surfaces. The coverage is pretty good. You can also use a paint sprayer for an even smoother finish. The paint sprayer is on my supply bucket list for home improvements. Ohhhh Santa.....
- Primer
- I am a fan of Zinser Bull's Eye 1-2-3. Good coverage goes a long way.
- Paint
- I used Glidden Semi-Gloss. Ohhh....I can't remember the color. A nice pure gray. Paint several thin coats. It will dry faster and your finish will be smoother. No drips!
- MinwaxWaterBasedPolycrylic
- Applied as a top coat. I did two coats letting it dry between coats. It is a protective finish.
I decided to leave all the bumps and bruises because design does not always have to be super perfect, but it should always be super personal. For me, the bumps and bruises in these pieces tell me that there is a history - it's not super polished or out of the box - it's dated and it's been around.
The Results! I am in love! See how far a good primer and a little paint can go!


Next week I will tell you all about the lamps! Have any great finds that you have painted? Leave me the link to your blog or website so I can check them out!
Making Home, Home!
Kathleen