
PROJECT REVEAL | HELLO LOVE EVENTS
 Hey everyone!! How are you guys? I hope your Labor Day weekend was fabulous! Besides a little bug my daughter and I had to start the weekend off, it was great!
Now I know it's has been a while since I last posted, but I am here today! Yayyy!!! Ok, bare with me because I have to catch up. About two weeks ago I received some of the best news - an office I designed in total collaboration with my beautiful client Lacoya Heggie of Hello Love Events, was going to be featured on the spectacular Style Me Pretty Living. Little did we know it was going to be featured so quickly. Lacoya called me on Friday with an "OMG...the office is being featured today" and I was like "Wait...what, today!!" Totally unexpected and totally caught off guard. In case you missed it, be sure to click through the virtual pages of Style Me Pretty Living, Hello Love Office Tour. And...Yayyyy for the Friday feature!!!!

A little back story - I met Lacoya through my lovely friend Terri Baskin. I have written about Terri here and I am sure a few other places on my blog. Terri passed my information on to Lacoya because she needed a little help with her home office. Lacoya is the owner of a wonderful weddings and events planning business in northern Va - Hello Love Events. Isn't she as cute as a button!! #loveher And she could be a hand model too (see the intro pic)! *wink*
Note: To my design friends and future clients, and those thinking about the designer they love so much, but isn't local - please don't let location stop you. The amazing thing about technology (and transportation), is that it is mobile and accessible. You would be amazed at what can actually get done even if you (the designer) can't physically be there. Lacoya and I corresponded by phone, text, and lots of Skype.
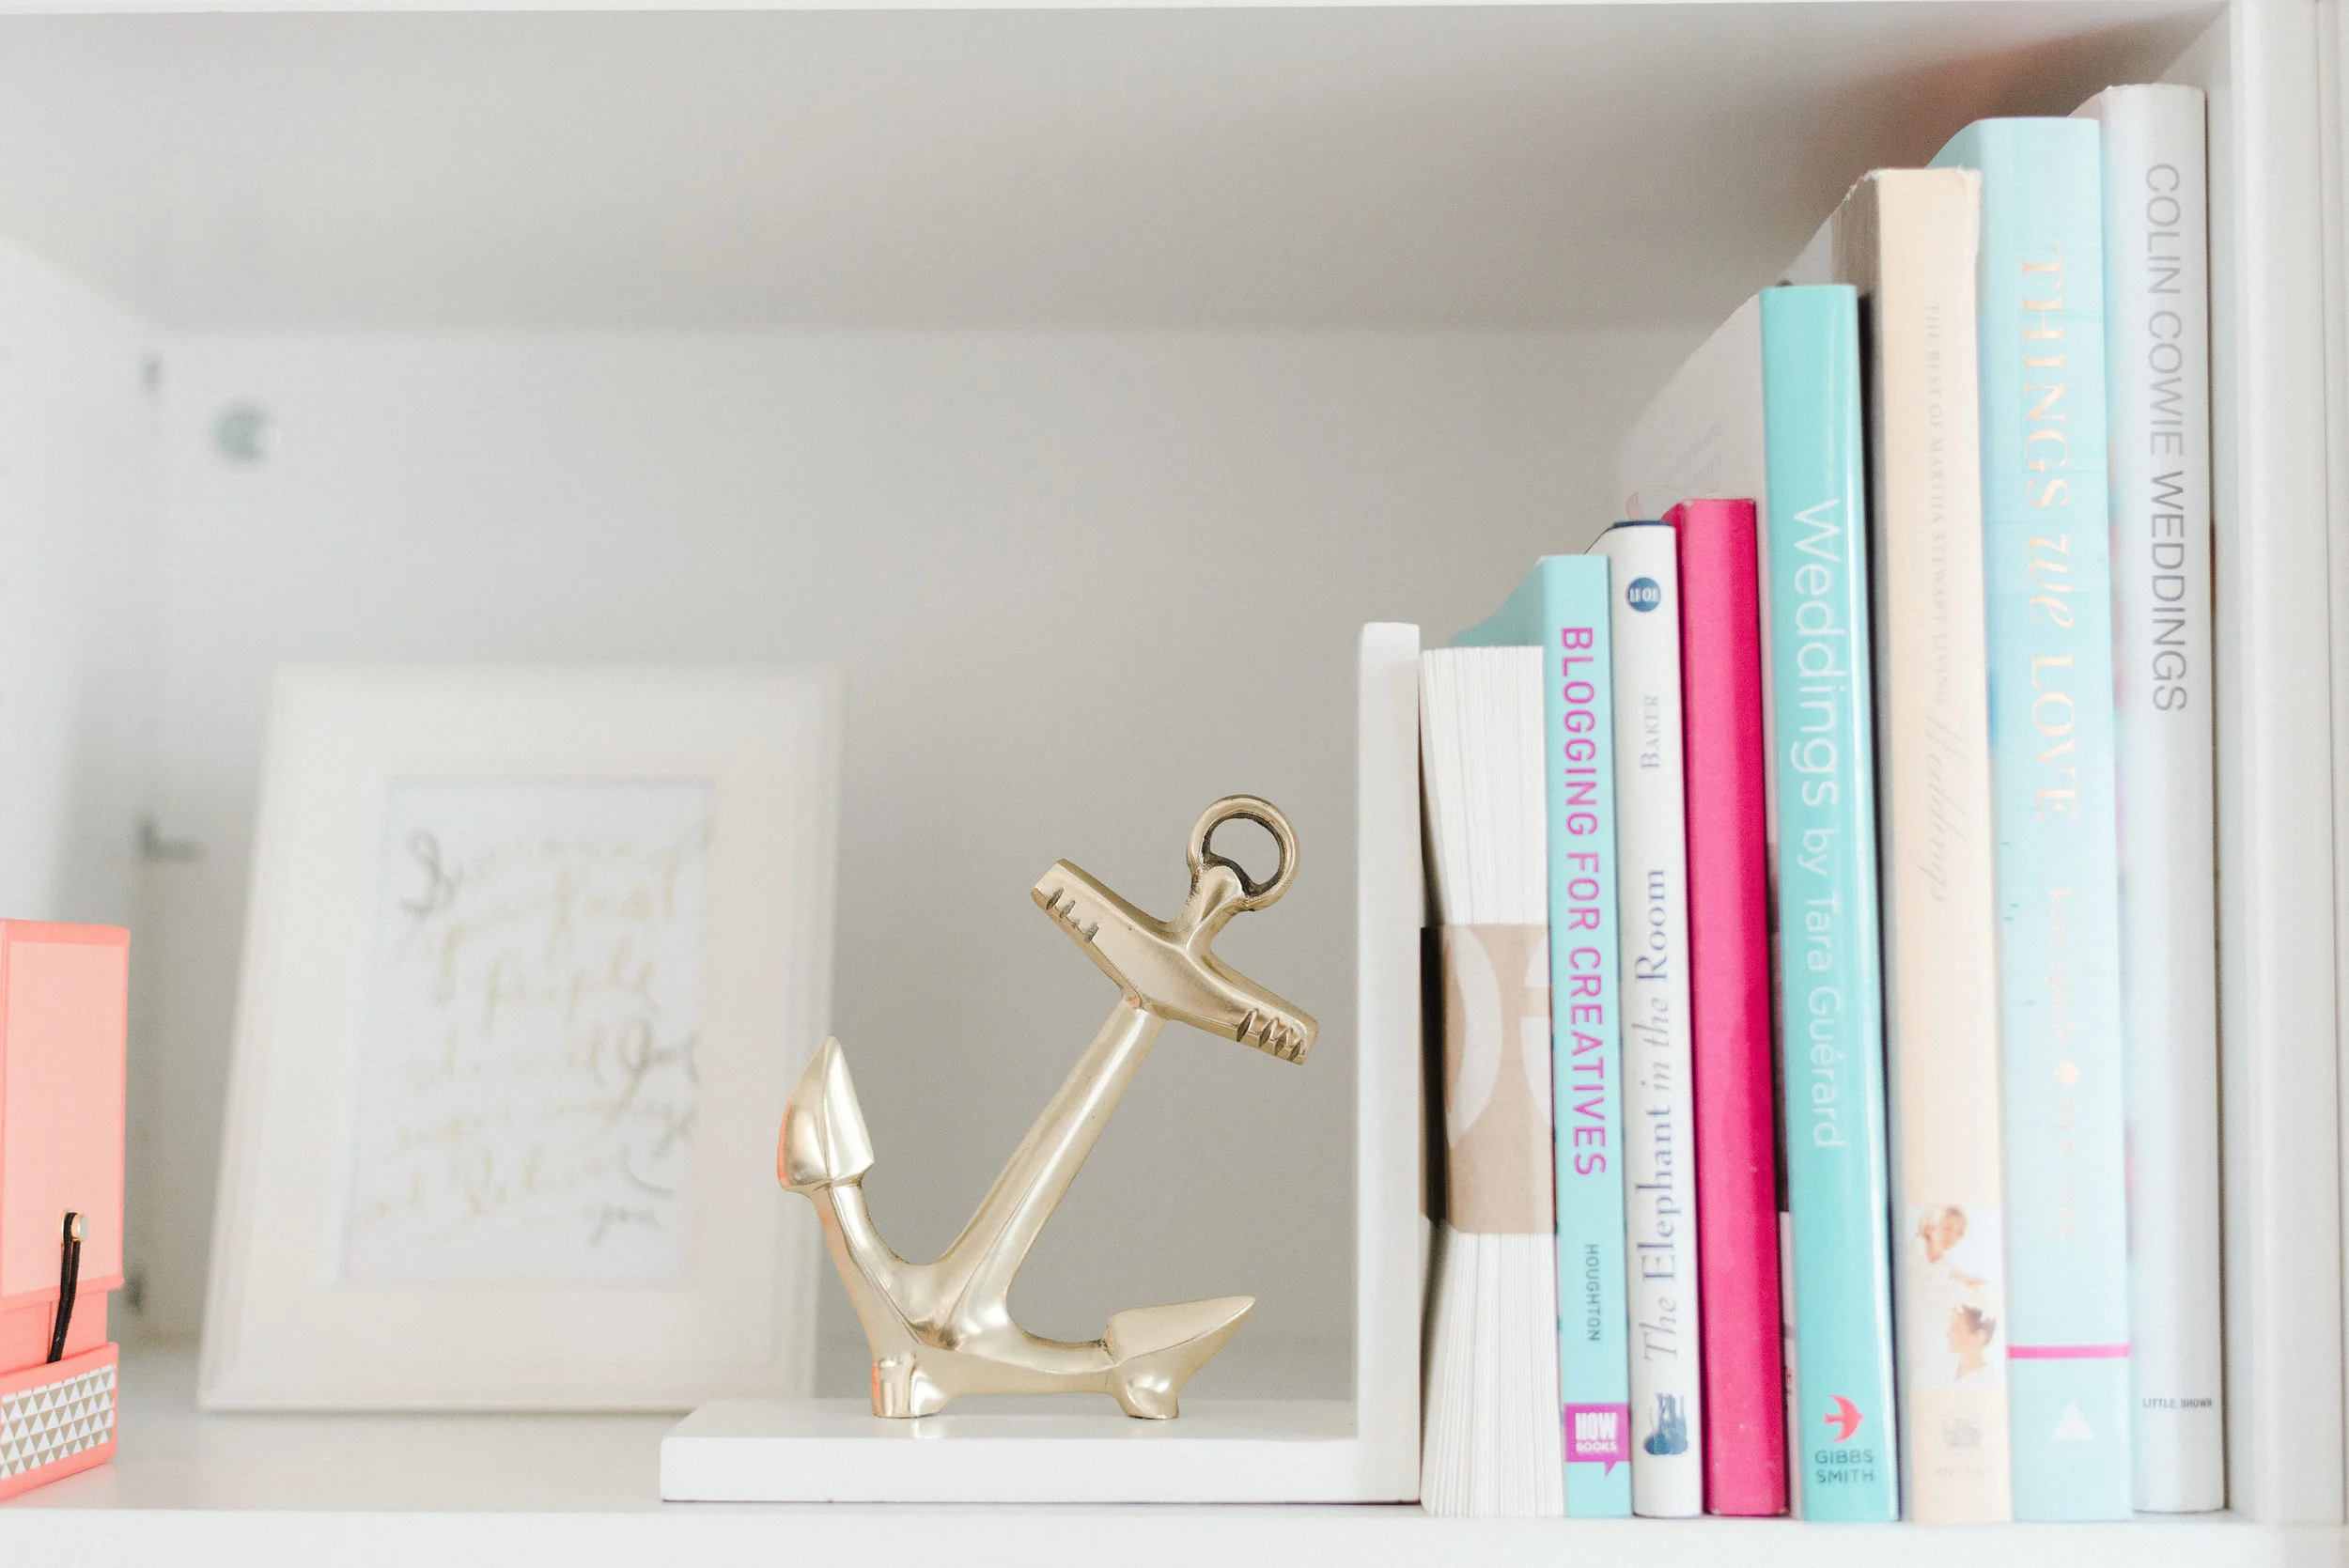
By the time Lacoya contacted me, she had painted her office a bright white, and purchased the bookcases, and desk. She was already headed in the right direction. She just needed a more solid plan. Lacoya was clear about the look and feel she wanted. Her words during our first conversation - Timeless, Contemporary, Clean, and Organized. I was happy to oblige. She also has an over-the-top obsession with Kate Spade (LOL), so I knew Kate (first name basis like we are friends, hehehe) would also serve as a major inspiration for this space.
Here is the design plan after a little bit of tweaking. And after she fell in love with a few other items she spotted and some items not being available by the time she was ready go all in, we had to tweak things again.

Can I tell you guys just how seriously in love with this space I am. And Lacoya - every time I speak with her, I can still hear (yes hear) the sparkle in her eyes and the pitter patter of her heart. A designer's dream is a happy client! Thank you Lacoya for being that happy client!
Here is a before pic after Lacoya installed the bookscases and her desk.

And here are the amazing after photos! Fresh, Functional and full of Style!


To see more don't forget to stop by the Style Me Pretty Living, Hello Love Office Tour.
Thank you Style Me Pretty Living for the feature! Thank you Andrea Pesce for taking all of these amazing photos! Thank you Lacoya Heggie for welcoming me into your home and allowing me to twirl my magic decorating wand!
Making Home, Home!!
Kathleen

PROJECT | TROPICAL G, THE REVEAL
 Now I know you have been following along with my virtual Project Tropical G! Please tell me you have...pretty please? Must I add with sugar on top? =) Well just in case you haven't, be sure to check out my previous posts - the design plan (Part 1), the making of custom drapes to replace the room's closet doors (Part 2), and custom made roman shades (Part 3). Lisa, my friend, my client, and fellow blogger at Casa Bouquet has written some great posts on how to do parts 1 and 2 yourself. So make sure you stop by her little haven in the blogosphere too!
Project Tropical G Revealed!
A quick reminder of what the space looked liked before. Lisa referred to it as her junk room; the catch all of everybody's things. But the after is nobody's junk room. It is a fully functioning space that feels fresh and a bit stylish.

The Overall Vision
Her love for Hawaii and her home being known as the Tropical Cottage directed me to design her space with some white furniture pieces for the cottage feel, mixed with bold colors for the tropical look and feel. Although the room was going to be punched up with color, the overall feeling was to be calm and relaxed - a long way from where we began.
Lisa is one of my virtual clients and we are separated by many, many miles, like over 500! Working with a client virtually is no easy feat - the main reason - because we (the designers) want to get our hands on the space to see everything in person, to touch everything, and to style everything. Luckily for me, all the major items had arrived and she had begun putting things together. I was planning a trip home to my beautiful state, North Carolina, and planned to make a special trip to her home to finish things off as much as I could. My mom, sister, and little baby boy accompanied me and let me just say, were God Sent for this project. Love you mom and sis!
Needs For The Space
Not sure if you remember her needs (Part 1), but here is what we did in the space:
- Painted the room with Sherwin-Williams 6715 Lime Granita.
- Added Bankable bookshelves and the Guildmaster Waterfront Harmony, a beautifully carved chest, for organization and storage.
- Placed an extendable dining table as the work surface.
- Added custom drapes using Waverly Peaceful Perch Sherbert fabric.
- Hung botanical artwork Lisa photographed herself in Hawaii. I would love to see her fill up the entire wall with botanical prints. The colors work so perfectly in this room.
- Added overhead and task lighting.
- Added a flat screen tv in place of the old box tube tv to free up the top surface of the chest to house her tv components.
My wonderful client later added a few more items to the room which you may see on her reveal at Casa Bouquet.
More Reveal Photos - Grab your pineapple, your lei, and let's HULA!


Can't you just feel the tropical vibe?! I absolutely adore this space. Removing the doors literally gave us just about half of the room back, it is packed with storage, and she has a great work surface to lay everything out for her work, crafting, sewing, and the list goes on.
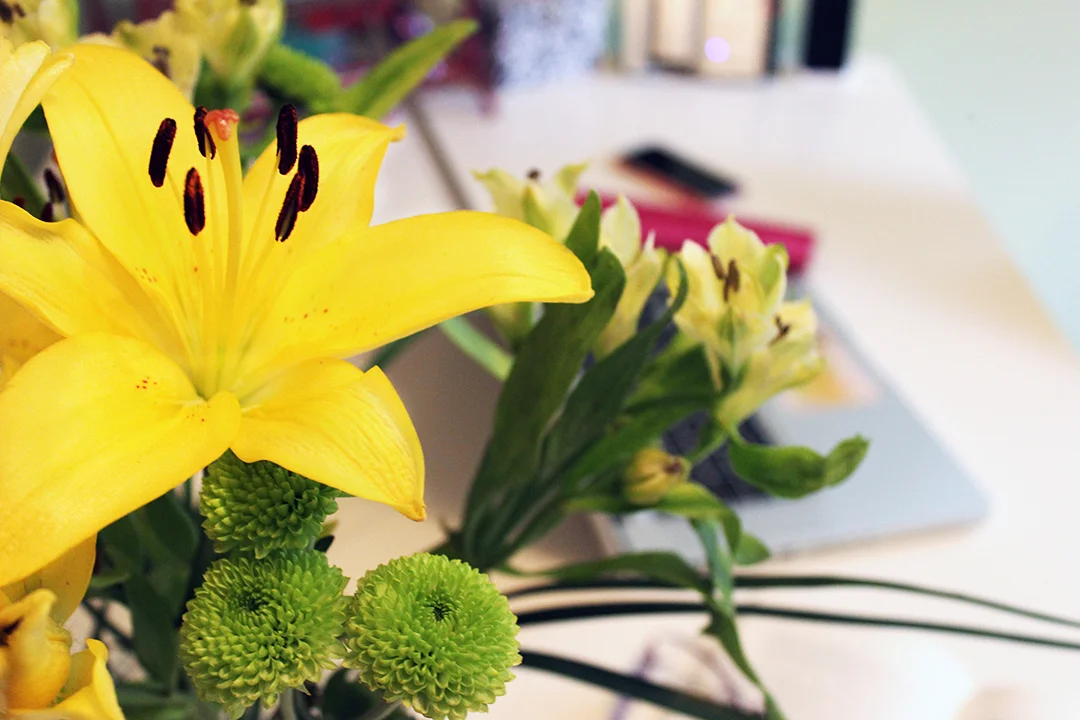
Since this makeover, Lisa has texted me the sweetest messages letting me know how the design of this space and the way she works in this space has changed her life. And, from seeing the fresh flowers styled in the room, her husband also keeps fresh flowers in her office now every single day. How lovely is that?! Nothing warms my heart more than to know that my clients are loving their new spaces, and that the design of the space suits their way of living. My goal as a designer is to help you live your best life in your space while keeping it fresh, functional, and full of style. And I think Lisa would agree!
Lisa, thank you for allowing me into your home! Many Blessings to you and your family!
Have a home office that you made over? I would love to hear about it! Don't forget to head over to Lisa's blog, Casa Bouquet, to see what she has written about this project. Thanks for stopping by!
Making Home, Home!
Kathleen
PROJECT | BE OUR GUEST
The Inspiration for Project | Be Our Guest - ' The Green Mile'. I painted this piece back in 2008. It is my favorite piece of art. I have received many offers for it, but could never part with it because of how much I love it. I knew that this piece would be hung in the guest room. Shades of cream, red, pink, green, orange - the perfect color palette for this space. It added such a face lift to the room and makes me happy to see it finally hung. Let's take a look at the before...

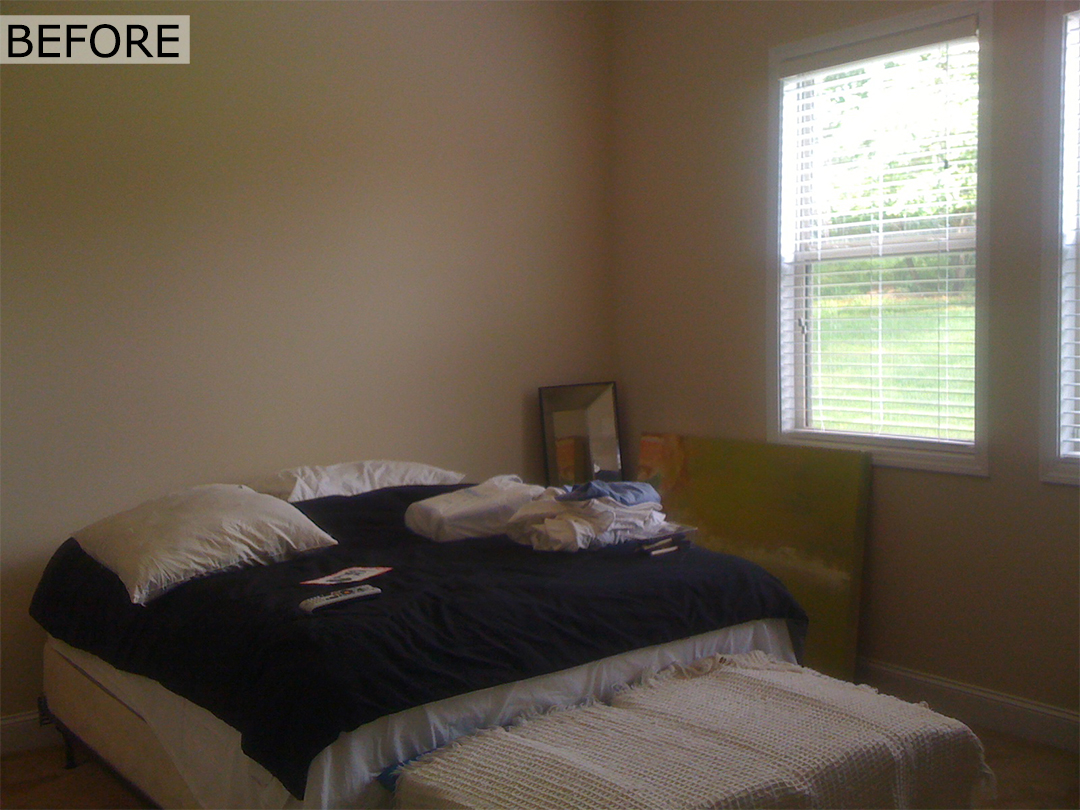
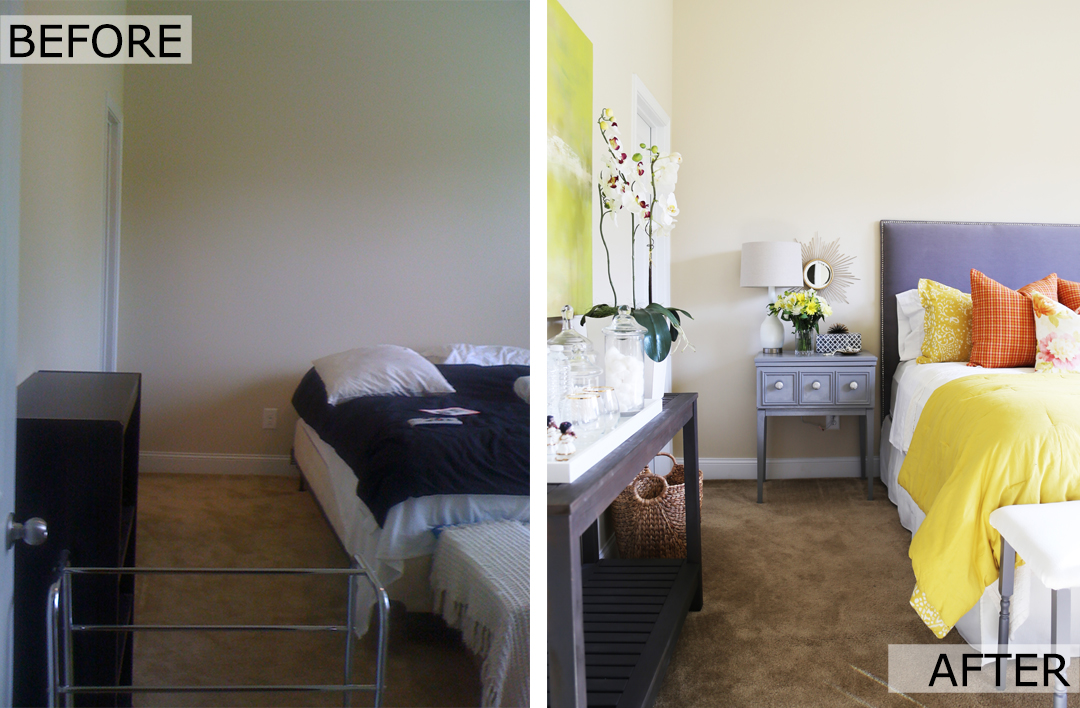
Boy oh boy have we come a mighty long way and it has taking a while to get here. Oddly enough, I thought I blogged about the sad beginnings of this room, but it appears that I never mumbled a word. So, now I have to give you the scoop on it's evolution. Here is where we began.
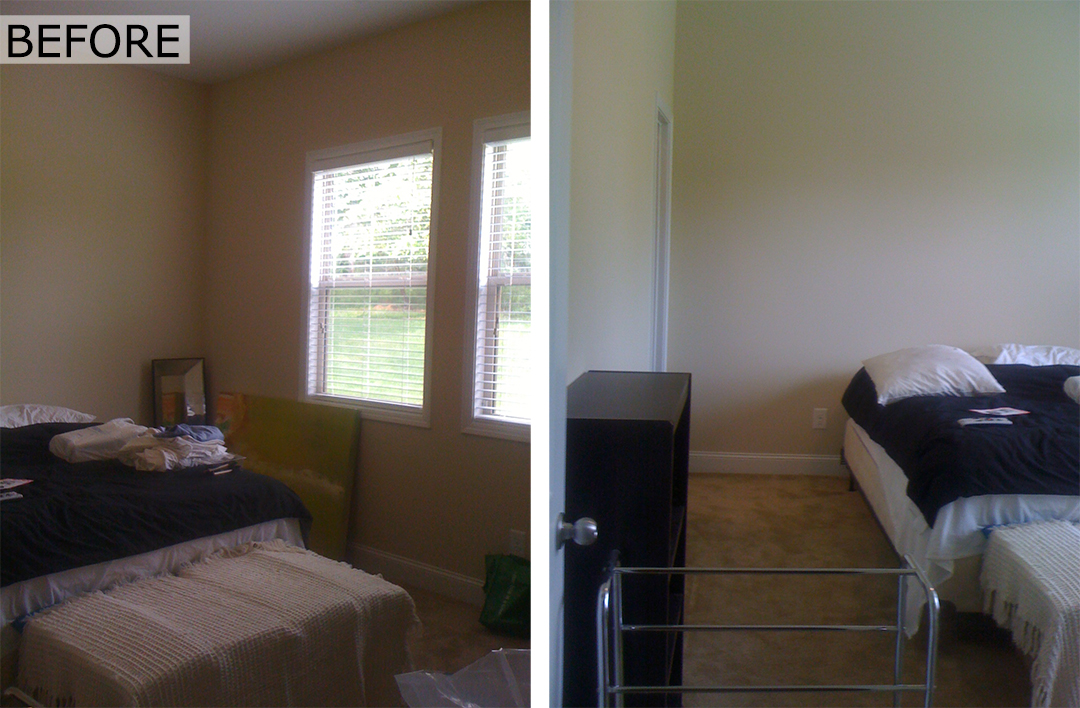
This room did it's duty as being a functional space, basically a place for our guests to sleep. But it definitely wasn't fresh feeling or had any style.
What we needed to do to up the anty:
- Clearly there was no design plan. Yikes and Sigh...as a designer, of course I know better. But sometimes projects fall on the back burner around here because I am doing other things.
- As you can see, we kinda needed everything but the kitchen sink - well everything except a bed. We were on a tight budget for this room. So everything had to be super cost efficient.
- Bed side tables were desperately needed. Fortunately I found side tables a few years back that I knew I would eventually use in this space. Details about how I overhauled those will be coming up in the next few posts.
- We needed storage. A dresser, a chest of drawers, something.
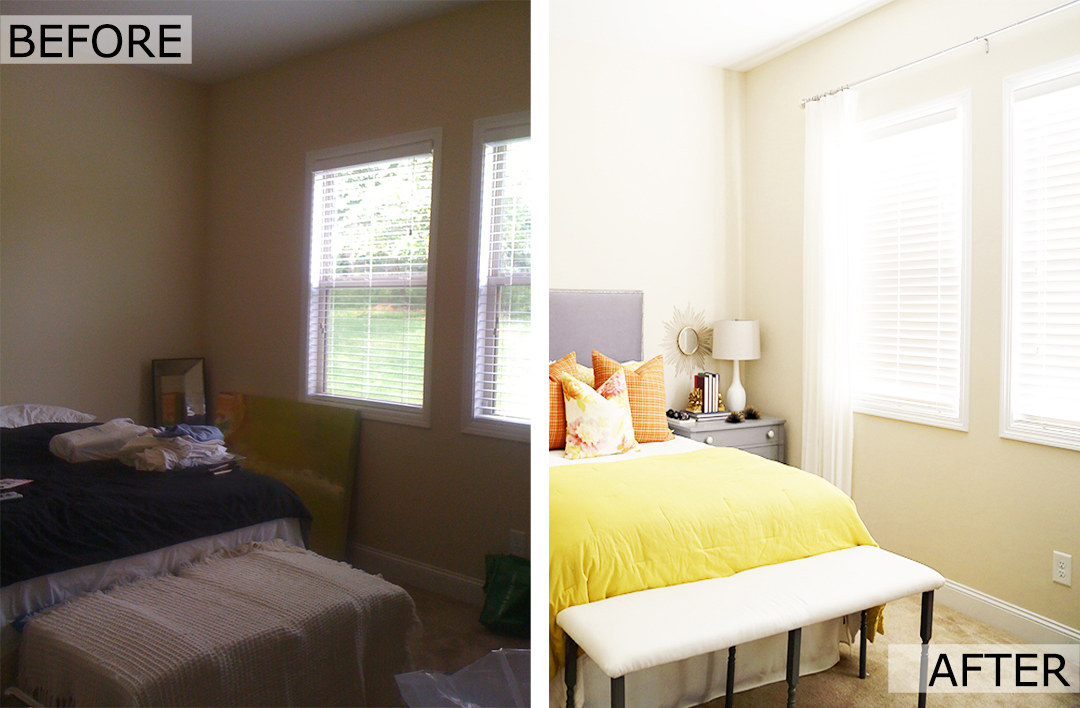
- Drapes were needed too. The harsh lines of the window trim kind of drives me crazy at times. And this is one of those times.
- A custom headboard to eat up some of the vertical space was also a must.
The good news:
- The room was like a blank slate. The walls were a rich creamy, antique white. So any colors could work.
- We had my favorite art piece of all times as the launching pad for the color scheme. And I knew exactly where I wanted to use it in this space.
- The layout of the room was super easy to work with it.
- The room offers an amazing amount of natural light so I knew exactly what color drapes I wanted to use and where to purchase them.
- I also already had the drapery hardware from at least a year prior. I think I found it on sale at HomeGoods for like $10 or $15. Score!!
After all was said and done - The Results!
There is nothing more that I love than a calm, neutral backdrop to bold punches of color. And that is exactly what we did here. Keeping the wall neutral allowed for warm grays to be used on the headboard, console, and side tables, and bold mustard and shades of orange to be used in the bedding. See how well the art plays with all the other colors in the room? I just love it!
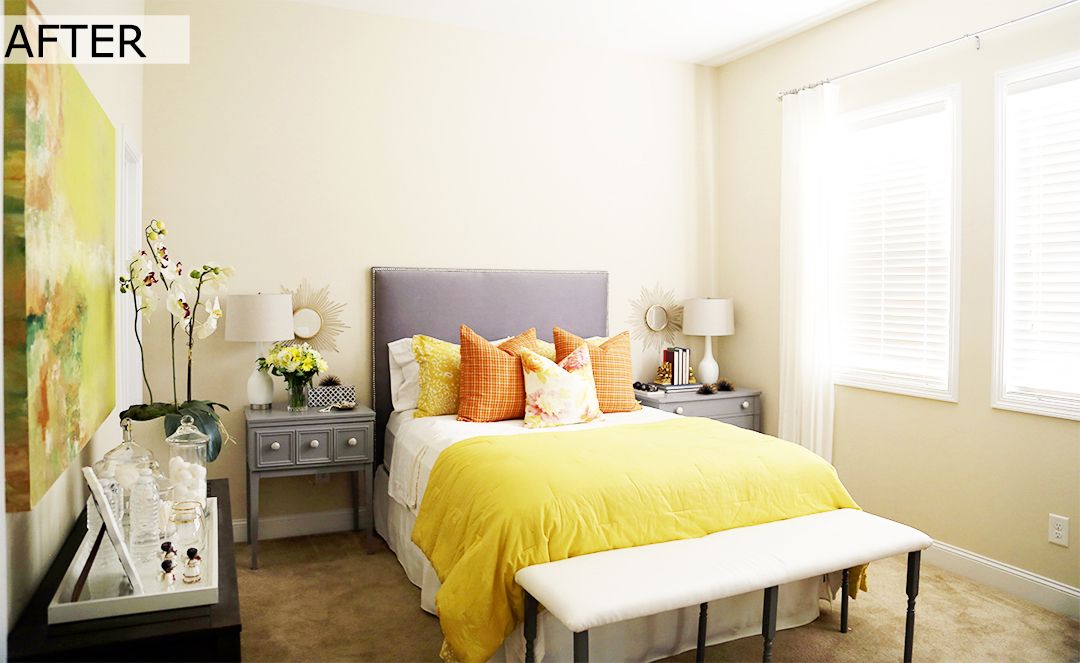


I have to admit, right now it's one of my favorite rooms in the house. It combines my husband's style (which is clean lined and minimal) with mine (clean lined with a mix of old and new).
There are quite a few KMC Creatives projects in here. I will be sharing them with you over the next few weeks. Be sure to subscribe so you don't miss out!
Making Home, Home!
Kathleen
Small Space, Big Style: ATL Bachelor's Pad Reveal
I was elated to hear from one of my former clients (Ken B.) telling me that he was relocating from North Carolina to Atlanta. While in North Carolina I helped him decorate his single-family home and also painted some custom art pieces. In the middle of his project, we received word of an opportunity for my husband to relocate to Atlanta for his job and after much thought we decided to take it. After sharing the news with Ken and discussing how to keep his project moving along, he said those three little magic words every decorator wants to hear...I TRUST YOU!! So to keep his project on track, I assisted him via telephone, text, email, FaceTime - however we could communicate to make sure the job would get finished. It wasn't easy, but we got it done. PHEW!!
Because of how great our relationship has grown and how great that project turned out,I was secretly hoping that he would ask me to help him out again...I mean why wouldn't he, right??? Well guess what? He did and I happily accepted.
Side Note Ken has an excellent eye so I am recruiting him as my design assistant. I have made him well aware of this, but I think he thinks I'm kidding. Ummm sir...NOT!! And I'm trying to get him to be my personal stylist because these days my attire is really lacking. I can't seem to pull things together for the life of me. When I tell you this man has an eye for fashion!! He is really working in the wrong line of work...but I digress!! =))) Ken if you are reading this, you my dear are awesome!
Back to the current room Now unlike before (1650 sq.ft of space in the single-family home), Ken decided to downgrade into a 800 square foot apartment - YIKES - and he sold just about all his stuff from his previous home which was full of great things...SIGH!!! I was slightly devastated to because had I known about this (I think he kept me in the dark on purpose so he wouldn't have to hear my mouth about it) I would have hit him up for some stuff!! So the hunt was on for new and maybe old, functional, and fresh items that would work double duty in this small space.
His Needs Urban, Fresh, and a Pop of Color. He stated the budget and said I trust you, do your thing - and that is exactly what I did!!
So here is what I had to work with initially: 1. Low profile bookcases he kept from the old home that we could use as the television/media console 2. Single lonely lamp 3. And the custom art I painted for his previous home (which I didn't want to use at first, but he insisted and now I'm glad we used them)
Major Purchases 1. A low profile sofa that wouldn't intrude to much into the space, but provide ample seating 2. More lighting 3. Side chairs 4. Ottomans (recovered to look great) 5. Window panels 6. Some accessories (he had some things I thought I could use)
The Room The creamy palette lended itself to be the perfect backdrop for what I wanted to do. For some reason here lately I am loving cream or white walls. I feel it gives me extra room to play a little more with color in the textiles and accessories.
Check out the space before...drab, drab, drab...
Before Pics (After the Purchase of the Sofa)


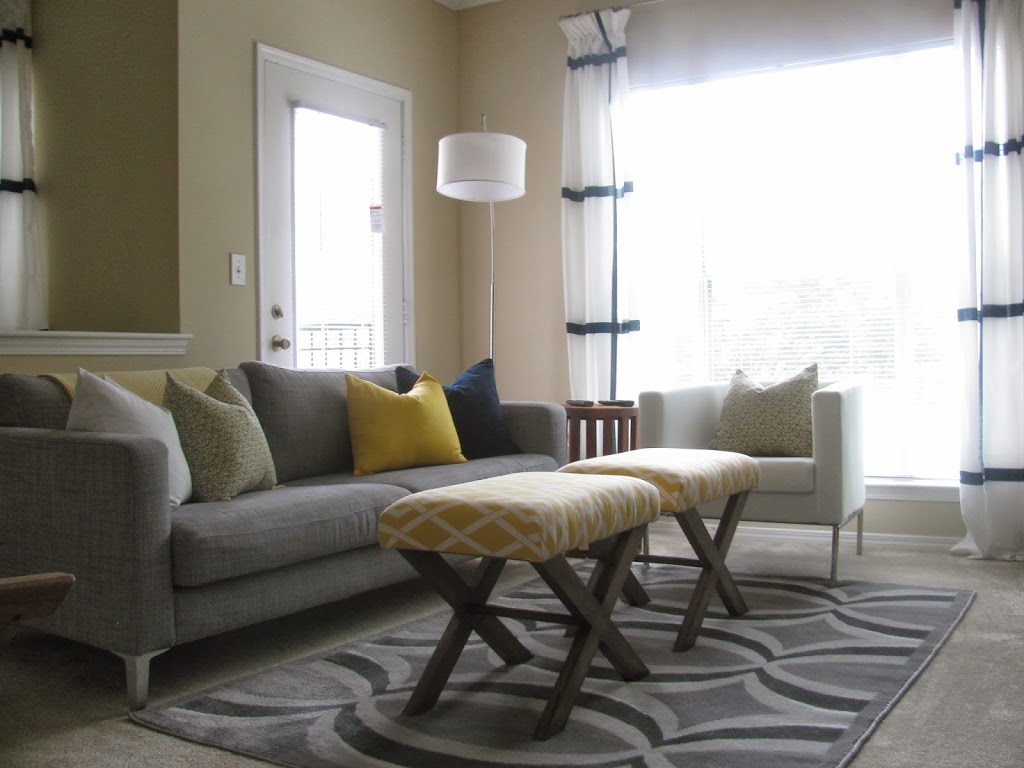
After Pics (KMC Customs - Art, Pillows, Ottomans)


Remember He Said Urban, Fresh, and a Pop of Color. So to make this happen:
1. Urban - Clean lined furnishings, low profile on everything - gives it a more modern, urban flare 2. Fresh - Not cluttered with furniture - just enough to provide the right amount of seating, accessories do not over power the room, and similar color story in rug and big furniture items 3. Pop of Color - Taken from the golden yellows in the art work - the ottomans and pillows add that element of pop
There is nothing like seeing everything come together the way you envisioned it and your client loving it just as much as you do. I absolutely love the way this space turned out and seeing Ken's face at the reveal was priceless.
Have an awesome day y'all and thanks for stopping by!
Making Home, Home! Kathleen