
DIY: Spruce Up Your Cardboard Letters

Previously I posted Project: Children's Playroom which showcased a DIY project using paper mache' (cardboard) letters. Some of you may have already seen the DIY letters around the blogs or on Pinterest. But just in case you haven't and you are interested in creating these for one of your spaces, below is my take on how to turn these basic little letters into something special and it is super easy to do!
For this project you will need:
1. Letters (obviously =)) 2. Some crochet yarn (of your choice) 3. Hot glue gun 4. And a couple of hours (as easy as it is, wrapping these big ol' letters takes time)
Of course I headed to JoAnn Fabrics with my 50% coupons in tow to pick up my letters and yarn. And an FYI, JoAnn's will take multiple coupons in one exchange and they accept competitors coupons also. Saving some dollars! Isn't that just awesome?!! Another great thing is that JoAnn's carries these letters in different sizes. I have not found this at any other crafting store.
So to begin, I opted for the largest size letters because of the high ceiling height in the space. These letters are 23.5" tall, so they vertically fill up wall space nicely.

Next, I began to wrap the letters from the top down to the corner, color blocking my yarn. I started with the purple yarn. Because of the shape of the N and because I was color blocking, I had to overlap the purple yarn. I found the inner curves and the corners to be the trickiest because I had to keep everything nice and tight. The curves on this N were challenging because it met with an inner corner. I had to almost squeeze the two sides of yarn into the same tight little area.
I'm not sure how I would do this differently if I had to do it again, especially if working with another N or an M (or a letter similar in shape). If you have any suggestions, I would love to hear them!

When wrapping the yarn around the letters I did not hot glue each yarn wrap. I placed a bead of hot glue at the beginning of each color block of yarn and at the end of the color block. I made certain to firmly pull the yarn around the letter and adjust each yarn wrap to tightly sit under the previous wrap.

In the case of the J - since the it was rounded on the end and not square like the N, closing the yarn wrap required me to loop it around like a swirl. Sorry the pic isn't as clear as the others. Not sure what happened here! =/ Hopefully you all can see exactly what I'm talking about!

That's about it! A super easy DIY project for you to try! The finished letters!!

Thanks for stopping by! Have an awesome weekend!
Making Home, Home! Kathleen
DIY: Ottoman UpDo
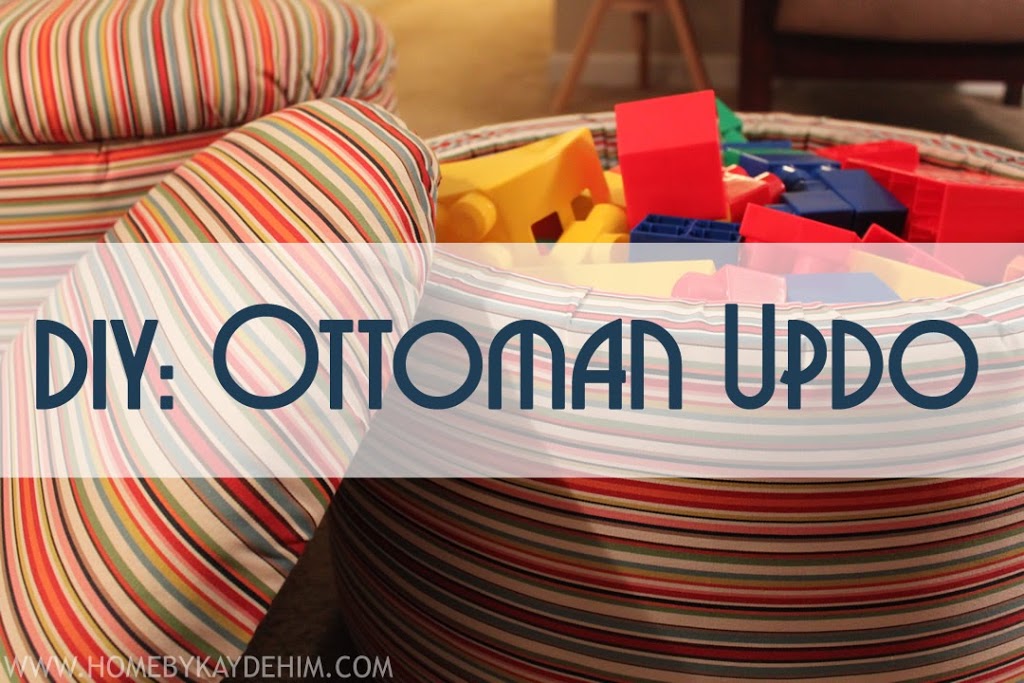
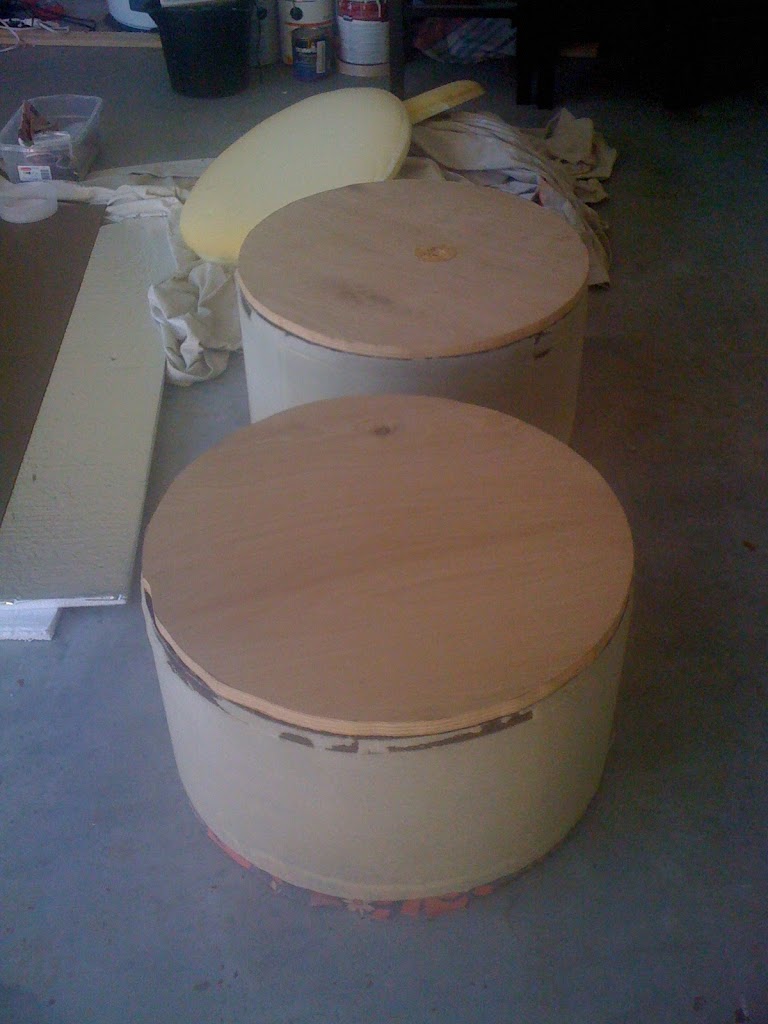
A few days back I revealed my latest design, Project: Children's Playroom, that had the little storage ottomans shown above. What you may not know, is that when I purchased those little babies they were not made with storage at all. When I first saw them, I knew they were the perfect size and shape for the playroom, but they needed to be overhauled just a bit.They had a pretty solid body, but when I flipped them over I noticed they were hollow on the inside. I thought...hmmm, what a waste. So Instantly my mind ran with the idea to not only reupholster them, but to knock off the legs, turn them over, make new tops and wala...new storage ottomans. So...that's just what I did!
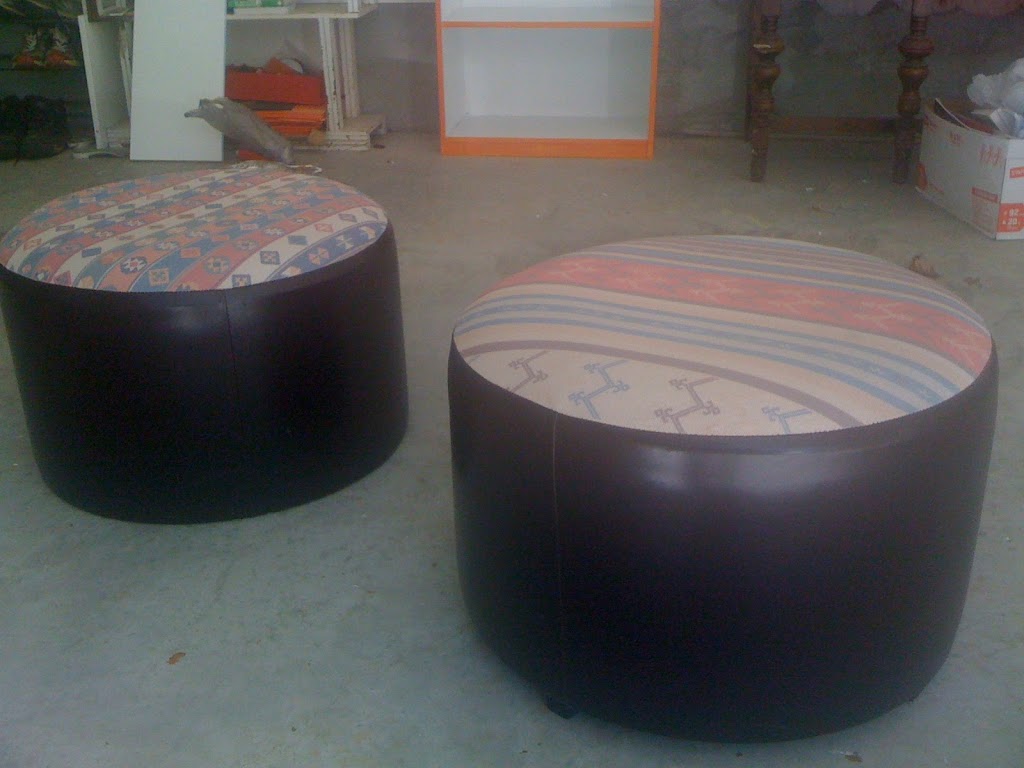 |
| Before Ottomans |
Tools you will possibly need to do something like this yourself.

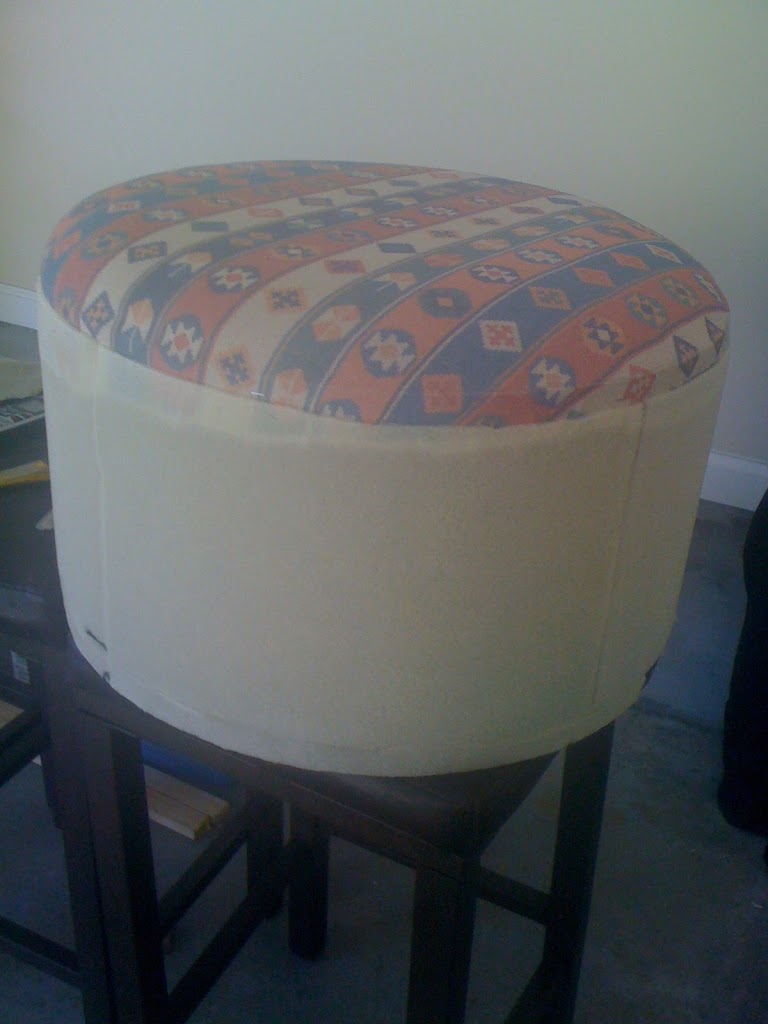
I began by knocking off the little peg legs and removing the existing fabric. The fabric was attached by nailheads all around the bottom of the ottomans (such a waste of nailheads, but I knew I could use them for another project). After removing a gajillion nailheads, the fabric (for the most part) easily pulled off leaving what you see below - a super thin layer of batting and a fabric covered top.
So what is batting? Thanks for asking...Basically batting is a thin layer of cotton, polyester, or wool that goes between layers of fabric. It can come in different thicknesses and is usually sold by the yard. Most fabric stores or shops that specialize in upholstery products carry batting you can purchase.
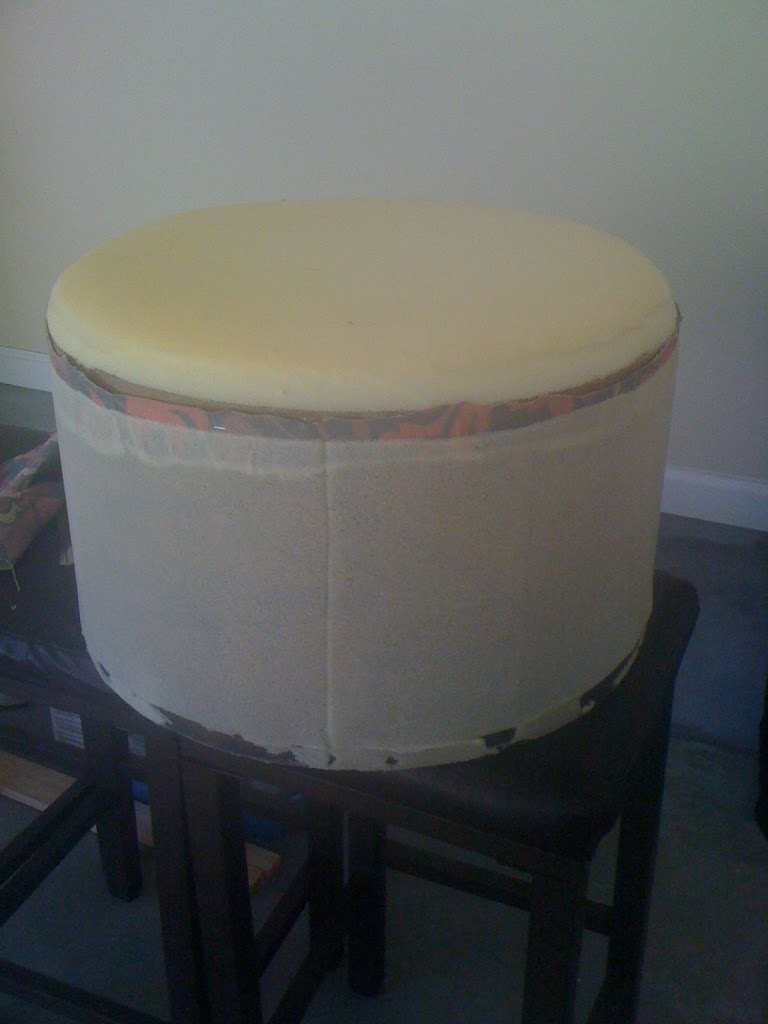
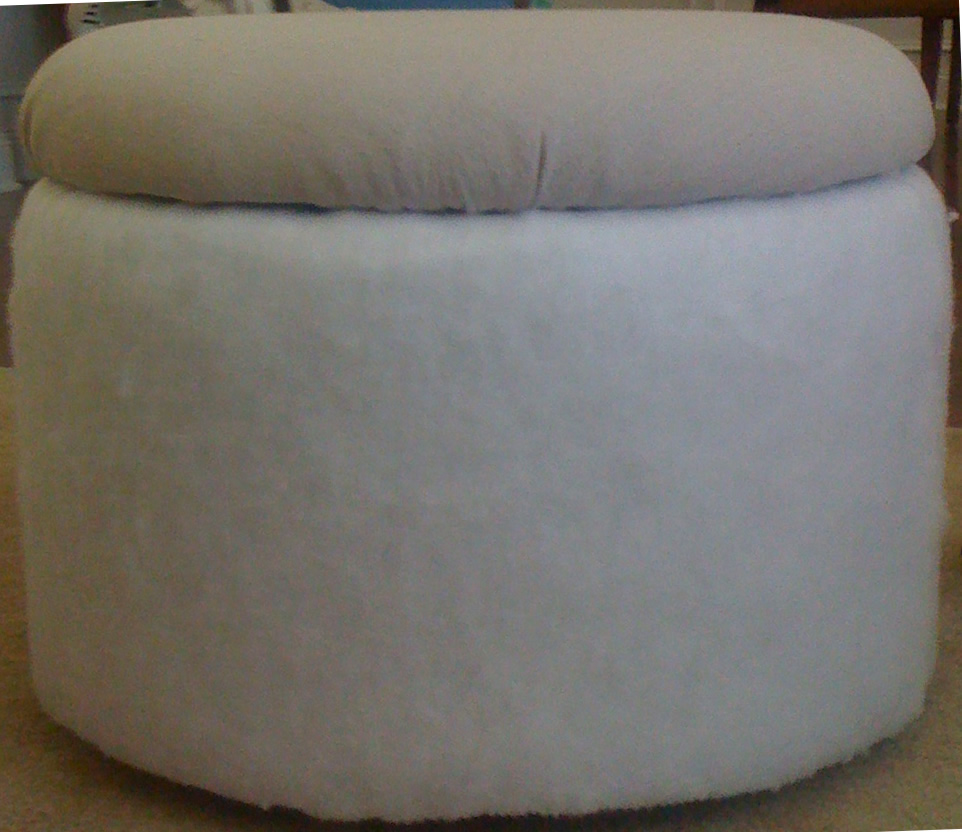
I then used the foam topper to trace out the exact size the new wooden tops needed to be. I knew that the little kiddies and their friends would be pouncing on these tops so I selected two small squares of a pretty sturdy wood (ohhh....I can't remember) to cut from. After tracing the shape onto the wood, I used my handy jigsaw to cut the wood into rounds. I then glued the foam toppers onto the new wooden tops and wrapped batting around them (sorry, I forgot to take a pic).
Notice also that the batting here is much thicker than what was originally on the ottoman. I selected a thicker batting because little kiddies would be running around and I wanted it to be a little more plush and soft just in case one of them bumped their little noggins against it while playing ultimate warrior or something. =)) You'd be surprised!!
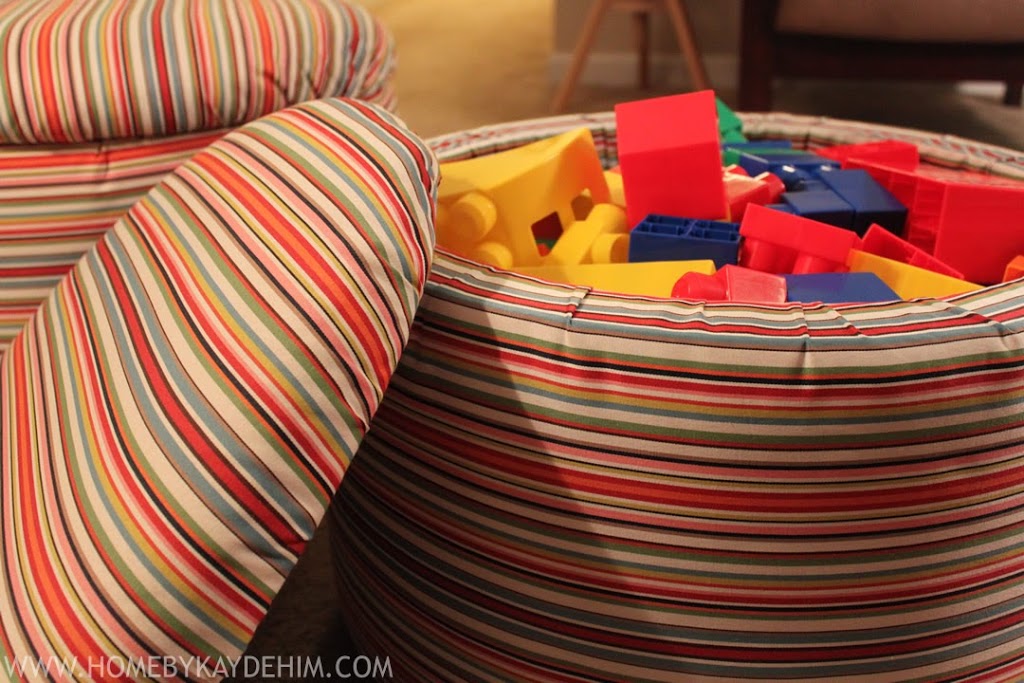
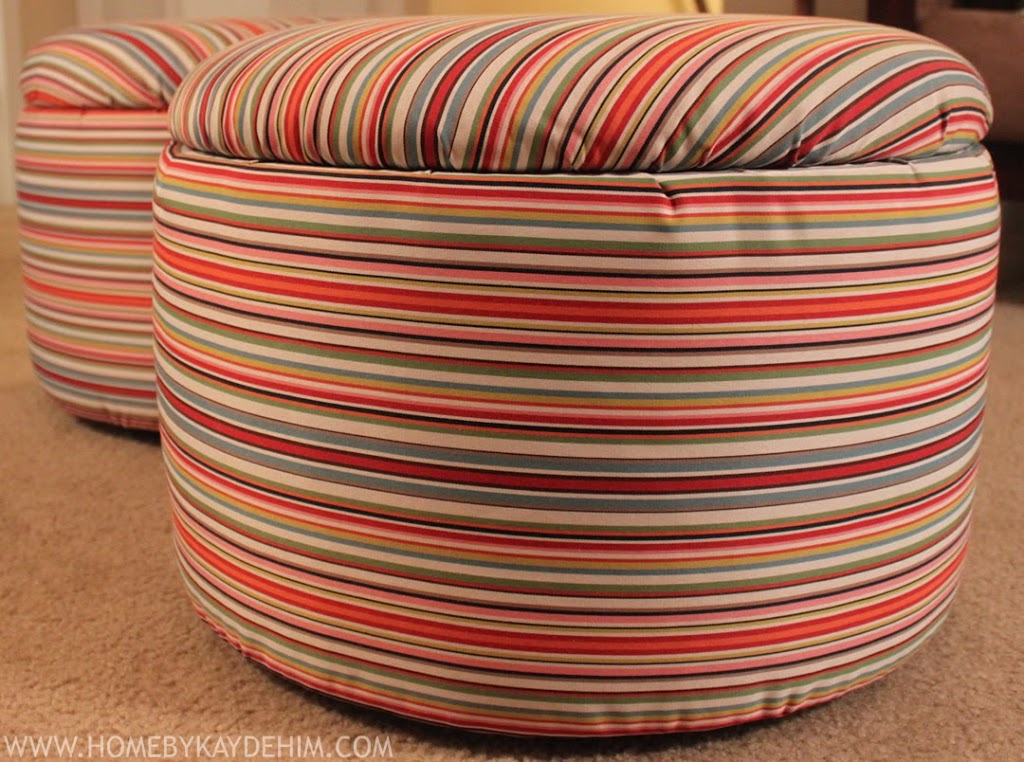
So there you have it folks!! This is something that you can easily do yourself! It doesn't have to be perfect, just perfect enough for you!! If you have any questions or comments please feel free to drop me a line in the comments section below!! Until next time, happy decorating!!
Making Home,
Kathleen
The Reveal, Project: Children's Playroom
Part 3 So I've yapped about the beginning and the middle of this project. Now it's time for the reveal! Just to bring you up to speed in case you've missed out on the happenings - the space lacked everything - color, organization, style, extra seating, and storage. You name it, it was missing. So after interviewing my young clients I came up with a plan to dramatically change the look, feel, and storage issues this space had.
The End
When I tell you I absolutely love and adore this space. I love the neutral vanilla cream walls around the space anchored by the charcoal chalkboard wall. I love the crispness of the white media console and bookshelf directly across from the gallery wall filled with wonderful art created by the kiddies. The bright white lamps and white side tables also help to keep things light and fresh. I love how the room is filled with color from top, to bottom, to the middle, but balanced with the creamy walls and tan carpet. And the light...let there be light in a space that was dark and dreary.This space is happy, creative, bright, airy, organized, comfortable...just plain ol' fun!! And I must tell you, the kiddies absolutely loved it!! The chalkboard wall stole the show. They LOVED seeing all their art displayed and loved all the color. They even said it makes them feel happy being in there!
It makes me feel all warm and fuzzy when I design a space that's right on and everybody loves it not only because of it's beauty, but it's function!! It makes making home, home - just right!!
I hope you all love the space just as much as we all do...so...here you go!!

 |
| Before & After: TV Wall - Besta bookshelf and media console (removed doors) to create open storage, and added baskets for easy to reach games, videos, remotes, legos, and a few other everyday play items. Custom storage ottomans also helps to hide clutter, toys, and even a kid!! =)) |
 |
| Added custom box sofa backs, an orange and white mini-chevron fleece sheet draped across the back, orange throw, and a ton of custom pillows to break up the color of the massive brown sofa and add some visual interest. |
 |
| Gallery wall displaying the most beautiful artwork ever! Helps to fill up the massive wall space and add much needed interest, color, and fun! |
 |
| Around the room |
 |
| Lerberg bookshelf to display books. Added acrylic magazine holders to store books. Used clear acrylic to keep open, airy feel on bookshelf. Yarn letters above. |
Need design help? Please email me at kaydehimdesign@gmail.com. To my readers, Thanks so much for stopping by to check out the reveal. I would love for you to leave a message, a question, or share something you've done to spruce up a kid's space in the comments section below. Again, thank you and have an awesome day!!
Making Home, Home
Kathleen
Color Me Orange - Project: Children's Playroom, Part 2
Part 2On Monday I posted the beginnings of the Children's Playroom project, but now the real transformation begins.
The Middle
So based on the needs and wants of the kiddies along with the most crucial element - the budget - it was time to start making a little magic happen. I started with selecting the base color for this space and when I say base I don't mean painting the room a certain color. I only mean selecting a color that would be great as a subtle accent color, blending seamlessly in with other colors, while still adding a little extra umph. *drum roll please* So I selected a beautiful shade of pumpkin orange. Why orange you ask?
Orange Can Be:
1. A unisex color (especially for the youngins) 2. It can grow with the kiddies, transitioning nicely across the ages 3. It's fresh, it's bold, and it can pack a colorful punch
But...you have to make sure that you are selecting an orange that's not to peachy or pastel or too dark and almost red. =)
The Presentation Board
Just a little reminder about some of the key elements selected for this space.

Storage and Shelving
To begin this project, I visited my local iKea to source some bookshelves and possible shelving options. I selected the Lerberg shelf because of it's charcoal color, light weight, and it doesn't take up much visual space. I also selected the Besta bookshelf because it has great height and wasn't too wide for this small footprint. One thing I didn't like was that the bookshelf was not a bright white. It was actually off white (believe it or not it makes a difference) and that was not the right look for the space. Remember...all whites are NOT created equal. So you have to find the right white for you! To fix this little discoloring, of course I painted it along with the media console that was initially in the room.
Because the iKea bookshelf was not made of real wood and had a shiny top coat, I had to sand it with my orbit sander to rough up the surface a bit. I also sanded the media console although it's made of real wood. This just helps the paint adhere to the surface better and it also helps to make sure that over time it doesn't scratch or wear off so easily.
 After sanding both pieces, I primed them with Zinnser 1-2-3 Bulls Eye Primer. It sticks to just about every type of surface you can imagine. You can pick this and many other primers up from your local hardware store. I have tried a few primers and this one so far has worked out the best. I'm still searching for that perfect primer though. So if you have any suggestions please feel free to leave them in the comments sections! Thank you kindly!!

 SN: Sometimes designers have grand ideas that just so happen to not work out. Keep in mind, it's not always about the fail, but about how fast you can recover, come up with another brilliant idea, and keep it moving. So, to remedy this, I scrapped all the magnetic goup/clumps off the walls, primed that baby, and coated it with a wonderful custom shade of chalkboard paint. Moonlight, which is a super deep gray (almost black) was one of the tintable colors, but I knew it would be a little to dark for the look we were after. I had my Home Depot guy tint it at half percent to create a lovely shade of charcoal gray. WoooHoooo!!!Up next was the worst project I have ever attempted - a magnetic chalkboard wall - epic fail! So I had this wonderful idea (as a surprise for the kiddies) to have the anchor wall in the space painted with magnetic mess paint and then of course the chalkboard paint. Well let's just say things didn't go as planned. After buckets and buckets of that magnetic paint, including the horrible stench that came along with it, it did not even magnetize! I was however, able to take the empty buckets back to Home Depot and get the money spent back (awesome right?) So all wasn't lost!

Furniture
To keep costs down, we decided to keep the massive brown sofa, but to change it up a bit. The sofa was in great shape, but the pillow backs had become a little deformed because of years of back squishing. They were filled with a loose cheap stuffing that doesn't hold shape very well. So DIY to the rescue. I made some new, more clean lined boxy shaped cushions in an oatmeal color, not only to firm up the back, but to modernize the sofa a little. I also made a ton (and I mean a ton) of throw pillows to add a little extra comfort and that much needed color.
 And remember that "too much space" between the sofa and the TV? Well I sourced from my local Garden Ridge some ottomans that were the right size and shape for only $15 - YES you heard me $15! Talk about bargain shopping!! After a little TLC with new fabric and a little something extra special I decided to do to them (you'll see in The Reveal and I'm doing another post on recovering these ottomans), they turned out to be just what the space needed!!
 I also picked up two side tables from iKea for $20 each. I was going to build some tables, but remembered all the other DIY projects I had on the list, so I figured I better just find something that looks great and serves the function needed. Believe it or not the original use of these little tables is not as side tables at all, but as plant stands. See folks, you have to get outside of that box sometimes!! I selected them because of their slender size and because of the bright white surface and steel legs. I also liked the lightness of these little stands visually. Because they are open below they hardly take up any visual space. Kinda helps to keep things a little more airy.

Accessories
Last but not least, the accessories - these are the things that really make you smile. The things that add life to a space. The things that make you want to live and be in that space. The things that make the space feel like HOME.
To bring about some color and add a little excitement, I turned to two of the best artist I know, the kiddies!! Some of the best artwork that you will ever find is children's artwork and these kiddies had a ton. It was actually hard to pick and choose because they had so much good stuff. Already having an idea of what I wanted to do to liven this room up, make it feel like a kid's space, but make it just as beautiful and fitting for mom and dad, I had to carefully curate the art and select a series of cost efficient frames. Coming in at $2, $4, and $6 a piece for the frames, the budget was right on and the space would be whimsically filled! You'll see all this in The Reveal!! In addition to the children's art, I also created some yarn letters from some cardboard letters I picked up from Joann's Fabrics. You can do soooo many things with these letters and they look super adorable! A tutorial on making the yarn letters will also be coming up.

So, I hope you enjoyed this post, learned a little along the way, and even more importantly, I hope that you will come back for The Reveal on Friday!! Thanks so much for stopping by and please feel free to leave a comment or ask me a question!!
Making Home, Home!!
Kathleen