
NEW PROJECT | STARGEN PREP

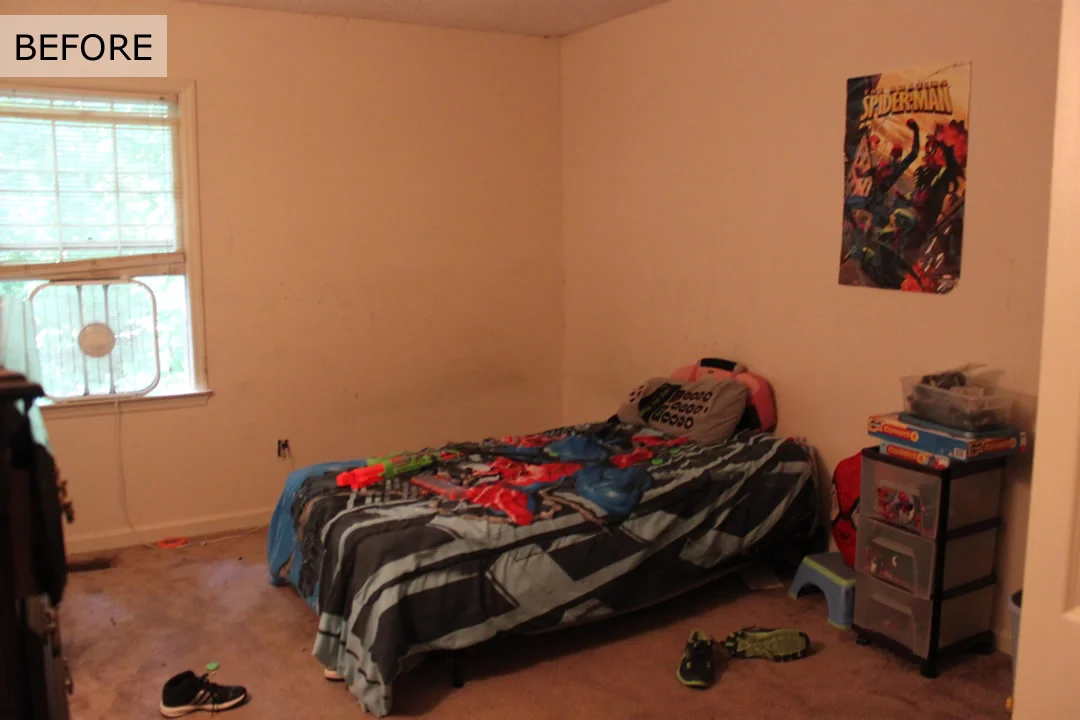
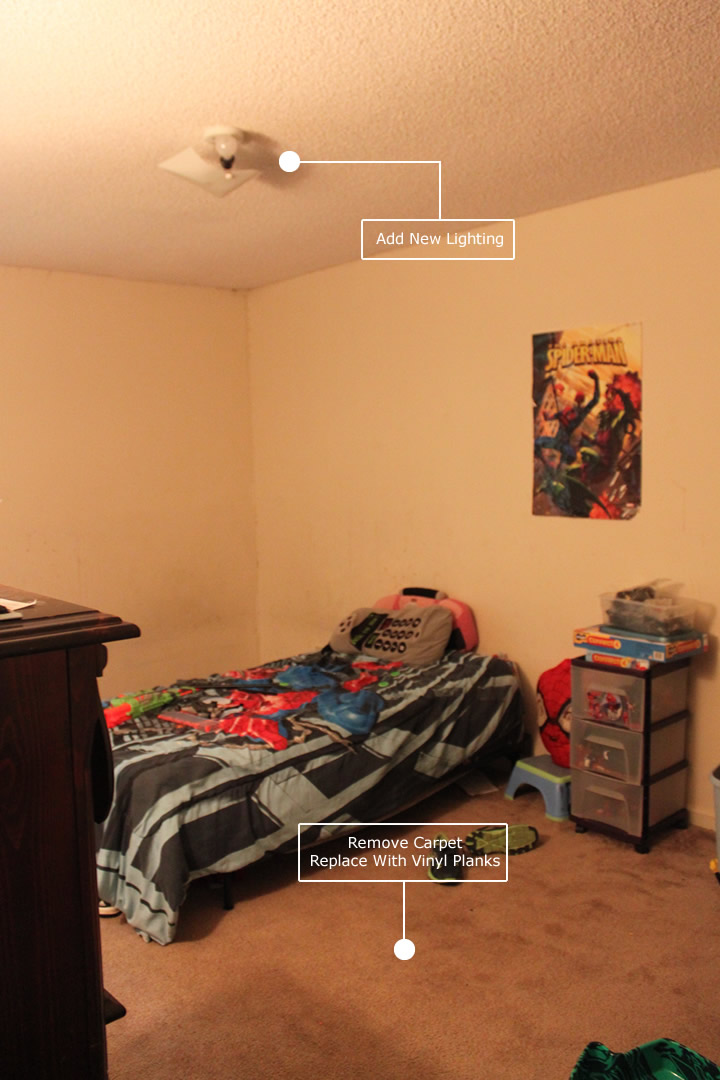
 Hey everyone! I know, I know...it's been a few weeks, but I am here today bringing you a new project I've been working on. I am introducing to you - Project Stargen Prep. My little client is moving into his tween, well almost preteen years, and his mom thought it was befitting for him to have a room makeover. And looking at the before pic I know you agree!
I first met my clients when we moved her from North Carolina. The mom and I instantly hit it off and our sons are best buddies. I have probably talked her head off about starting my design business a gazillion times and of course once the dust settled we got started on Stargen Prep.
I have to admit, this project has been the most challenging. It was my first time hiring trades, getting quotes, and having some other things custom made. Being transparent - it was a little scary. I have hired folks for myself before, but for someone else - admittingly I was a little nervous. What if they didn't follow through? What if their work was shabby? What if they ended up not being worth the cost? All those thoughts ran through my head and unfortunately, some of my thoughts quickly became a realization. I had a few trades folks with no follow through. Talk about totally frustrating - especially being in the midst of a project and at the risk of looking like you (the designer) have unreliable people. Sigh..I have never been so upset. But a good designer grows from these challenges, quickly puts things in perspective, rolls her own sleeves up if need be, and keeps the project moving. And guess what? That's exactly what I did. Oh..and thank God for an understanding client, some aren't always so forgiven.
The Plan - Fabrics & Floor Plan
So, what is the plan you ask? We are PREPPING this room out! It will have a preppy, Polo Ralph Lauren meets classic boys club kinda look and feel. Of course it will still have some kids stuff too. He loves to draw so we will use some of his artwork to decorate the room. This will be a space he can grown in well into his teenage years, possibly even headed out for college. Hopefully he won't tire of the look.
The color scheme was derived by my little client. He knew exactly what he wanted - Red, White, and Blue. He said he had to have those colors because they are his absolute favorites. With that in mind I found the most amazing plaid fabric. I used it as my base fabric and I love the color story.

The mom expressed moving a desk and bookcase into the room, upgrading the size of the bed, and adding seating. Increasing the size of the bed took away some valuable floor space, but I was able to come up with two plans to present to them. Now I love floating furniture in a room, but the second option gives just a little bit more space for play. Check back when we do the final reveal to see what we ended up doing with the space. 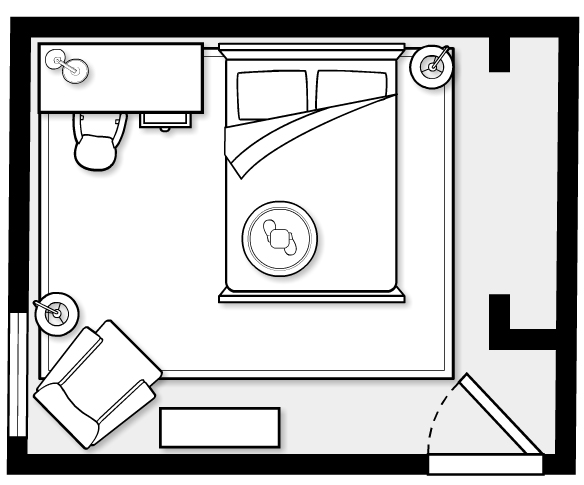

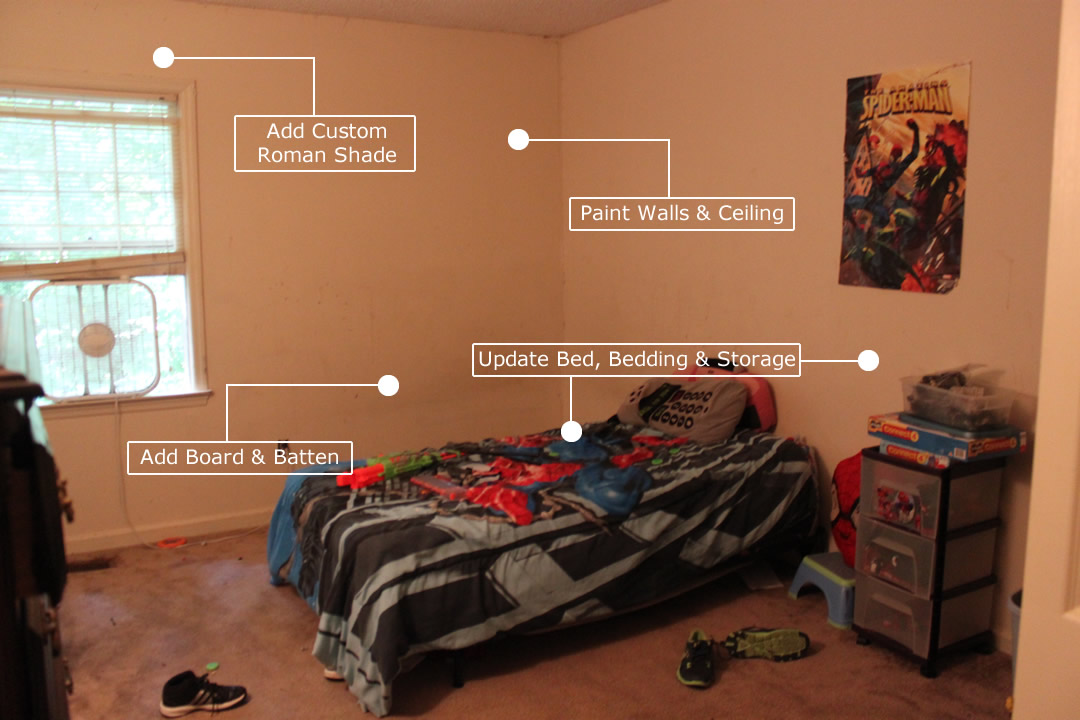
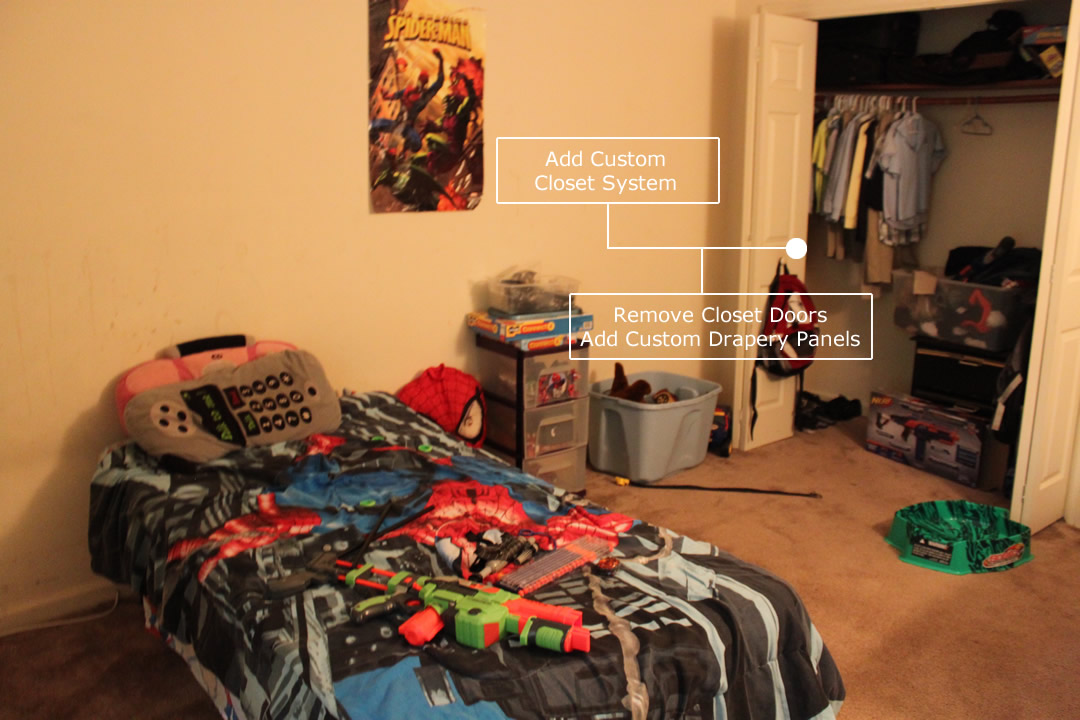
More before pics with a few plan details.
Be sure to stop by next week to see the progress we have made. It is looking pretty darn amazing!
Making Home, Home!
Kathleen

PROJECT | TROPICAL G, THE REVEAL
 Now I know you have been following along with my virtual Project Tropical G! Please tell me you have...pretty please? Must I add with sugar on top? =) Well just in case you haven't, be sure to check out my previous posts - the design plan (Part 1), the making of custom drapes to replace the room's closet doors (Part 2), and custom made roman shades (Part 3). Lisa, my friend, my client, and fellow blogger at Casa Bouquet has written some great posts on how to do parts 1 and 2 yourself. So make sure you stop by her little haven in the blogosphere too!
Project Tropical G Revealed!
A quick reminder of what the space looked liked before. Lisa referred to it as her junk room; the catch all of everybody's things. But the after is nobody's junk room. It is a fully functioning space that feels fresh and a bit stylish.

The Overall Vision
Her love for Hawaii and her home being known as the Tropical Cottage directed me to design her space with some white furniture pieces for the cottage feel, mixed with bold colors for the tropical look and feel. Although the room was going to be punched up with color, the overall feeling was to be calm and relaxed - a long way from where we began.
Lisa is one of my virtual clients and we are separated by many, many miles, like over 500! Working with a client virtually is no easy feat - the main reason - because we (the designers) want to get our hands on the space to see everything in person, to touch everything, and to style everything. Luckily for me, all the major items had arrived and she had begun putting things together. I was planning a trip home to my beautiful state, North Carolina, and planned to make a special trip to her home to finish things off as much as I could. My mom, sister, and little baby boy accompanied me and let me just say, were God Sent for this project. Love you mom and sis!
Needs For The Space
Not sure if you remember her needs (Part 1), but here is what we did in the space:
- Painted the room with Sherwin-Williams 6715 Lime Granita.
- Added Bankable bookshelves and the Guildmaster Waterfront Harmony, a beautifully carved chest, for organization and storage.
- Placed an extendable dining table as the work surface.
- Added custom drapes using Waverly Peaceful Perch Sherbert fabric.
- Hung botanical artwork Lisa photographed herself in Hawaii. I would love to see her fill up the entire wall with botanical prints. The colors work so perfectly in this room.
- Added overhead and task lighting.
- Added a flat screen tv in place of the old box tube tv to free up the top surface of the chest to house her tv components.
My wonderful client later added a few more items to the room which you may see on her reveal at Casa Bouquet.
More Reveal Photos - Grab your pineapple, your lei, and let's HULA!


Can't you just feel the tropical vibe?! I absolutely adore this space. Removing the doors literally gave us just about half of the room back, it is packed with storage, and she has a great work surface to lay everything out for her work, crafting, sewing, and the list goes on.
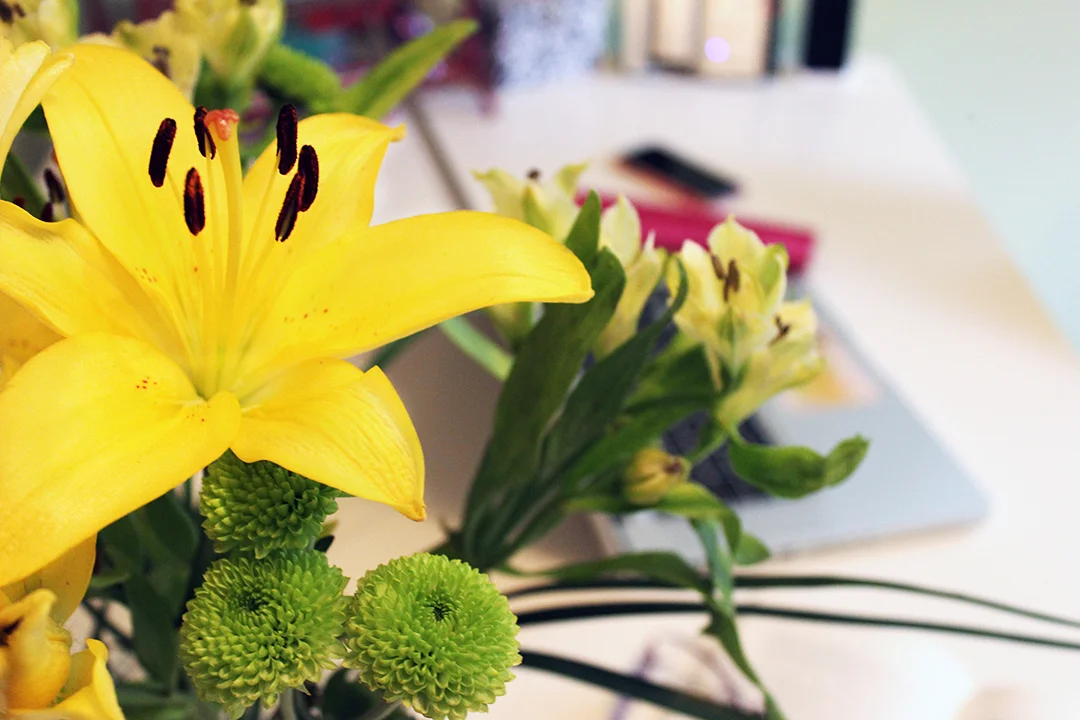
Since this makeover, Lisa has texted me the sweetest messages letting me know how the design of this space and the way she works in this space has changed her life. And, from seeing the fresh flowers styled in the room, her husband also keeps fresh flowers in her office now every single day. How lovely is that?! Nothing warms my heart more than to know that my clients are loving their new spaces, and that the design of the space suits their way of living. My goal as a designer is to help you live your best life in your space while keeping it fresh, functional, and full of style. And I think Lisa would agree!
Lisa, thank you for allowing me into your home! Many Blessings to you and your family!
Have a home office that you made over? I would love to hear about it! Don't forget to head over to Lisa's blog, Casa Bouquet, to see what she has written about this project. Thanks for stopping by!
Making Home, Home!
Kathleen
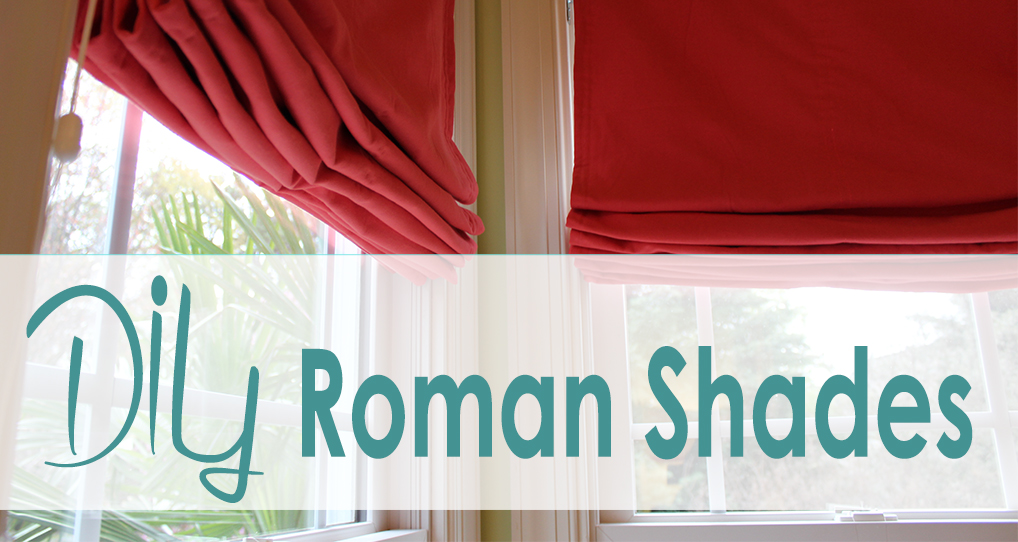
DIY ROMAN SHADES | TROPICAL G's OFFICE MAKEOVER, PART 3
 For starters, I LOVE the windows in Tropical G's office. They are nicely tucked away in the corner which gives full usage of the walls on both sides. They allow a nice amount of natural light into her space, and the view...OMG...the view is beyond amazing! It looks like a little Hawaiian oasis in her backyard. She has a huge, beautiful palm tree that sits right at her window and takes you away to a place that's all dreamy. Isn't the view all kinds of lovely! GAAH!!!!

I knew when we started this project (Part 1) that I wanted to hang roman shades. Because of how tight the windows are in the corner, hanging ceiling to floor drapes was not the best idea. And the fact that I was recommending the removal of the doors from the closet (Part 2) and replacing those doors with drapes was another factor. The roman shades would allow the room to feel a little more fresh and light, and could be easily pulled all the way up to escape to paradise. The fabric I selected paired so beautifully with the peacock fabric for the closet door replacement. It kept the tropical vibe going.
Tip: When selecting fabrics, I like to start with what I call a base fabric. The base fabric is used to pull together the color scheme for your space. It is a sure fire way to select fabrics and hues that complement each other.
Of course, the seamstress herself would have a hand at making the shades, and she is talking all about it today on her blog, Casa Bouquet. So to learn more, hop on over there and check it out. Be sure to come back next week for the final reveal of Project Tropical G!
Excerpt from Casa Bouquet – DIY Roman Shades
We had a little bobble when Kathleen (of Kathleen Mapson & Company) suggested roman shades for my two corner windows. Too many of the DIY links we found were for non-operational shades. So here’s my version of what works!
Kathleen chose a coral-red fabric with no pattern. So we did not have to worry about a repeat. Other supplies I needed were 1×2 pieces of wood for each window, 2 flat wood pieces for bottom of shade (1 x ¼ inch), 2 L-brackets for each window with screws, electric screwdriver or drill, electric staple gun, blackout curtain lining, roman shade tape with rings, cord for the rings, cord condensers, cord cleats, new size-18 machine needle, and 1 spool of thread to match the fabric. [I just love that the thread for this project was “Flamingo”!]
Don't forget to stop by Casa Bouquet now!
Making Home, Home!
Kathleen
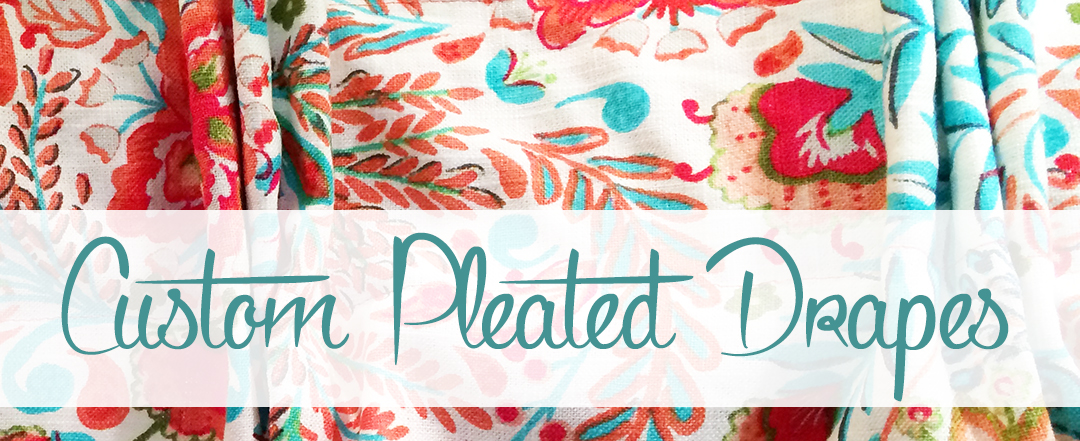
DIY PINCH PLEATED DRAPES | TROPICAL G's OFFICE MAKEOVER, PART 2

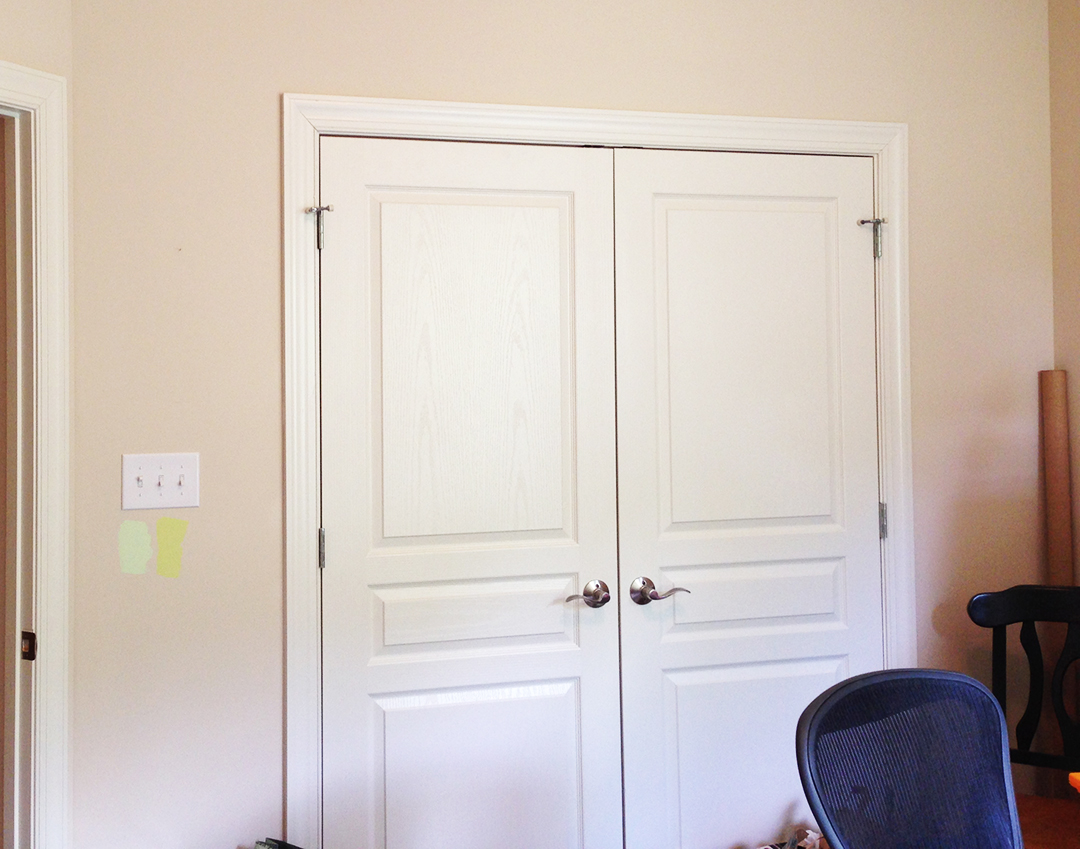
 As you could probably tell from the previous post about Project Tropical G (part 1), the footprint was on the smaller side - 10' x 11'. Because of it's size, I knew that removing one thing in particular in the room - the closet doors - would be a game changer. The doors (as you can see from the photo below) opened into the room. If the doors were left on the closet, they would take up too much floor space when opened, leaving little to no space to get all the furniture we needed into the room.
I proposed to Lisa that we remove the closet doors. At first she was not on board with the idea, but I knew that this was the right change. It took some convincing and the icing on the cake was when she told me that her husband and their daughter (who is a design enthusiast) was on board with the idea and they both totally 'got it' when she shared with them my idea. Don't you just love when that happens? So, what to put in it's place? Custom drapes of course! Adding drapes would not only give her extra space, but also provide the privacy she needs to keep hidden any items in her closet, (with the right fabric) give her some bold color and pattern, and add softness to combat all those hard office lines.
Tip: When working in a small space, consider removing the doors in your room. The swing of the doors can take away too much floor space. You can add drapes to provide closure or if you need something a little more private and you have an appropriate wall length, you could also add a pocket door or barn doors. Doing so can instantly add valuable space back into your room.
Because of her love of all things tropical, I sourced Waverly's Peaceful Perch Sherbert. The fabric boasted a bold print with shades of coral and turquoise, and hints of minty green like that of the walls. It also had a wonderful repeat of peacocks that I knew she would love. And why wouldn't she? This fabric embodied everything she loved!

Lisa has her own design ideas and her strength is at the sewing machine. I initially proposed back side concealed top drapes, but she wanted to modify the design and make pinch pleated drapes. I knew they would look just as swell so she had no arguments from me. And let me tell you, she did an awesome job!
Excerpt from Casa Bouquet - DIY How To Make Pinch Pleat Drapes
The “junk room” in our house was supposed to be my office! I was sewing and working around piles that didn’t have a place to belong. This is Part 2 of the journey from junk room to peaceful tropical office with Kathleen Mapson & Co. [See part 1 here!]
I was overcome when Kathleen first said, “You have to take down the closet doors.” She convinced me that drapes would give softness and allow more room in the office. It helped a lot that she found this gorgeous print with flowers and peacocks (Waverly Peaceful Perch Sherbert)! Today I’m sharing what I came up with for covering the closet while also being the accent wall.
Check out the results and read more about how to make your own pinch pleated drapes by visiting Casa Bouquet. You won't be disappointed!
Making Home, Home!
Kathleen